How to Receive Payment in QuickBooks Online
How to Receive Payment in QuickBooks Online
Recording a customer payment applies the money against their outstanding invoices, keeping accounts receivable up to date and your records accurate. QuickBooks marks the invoice paid and posts the money to the account you choose.
Step 1 – Open the Receive Payment Form
A Create (+) – Click the Create button at the top of the left navigation bar to open the transaction menu.
B Receive payment – Select Receive payment under the Customers column.
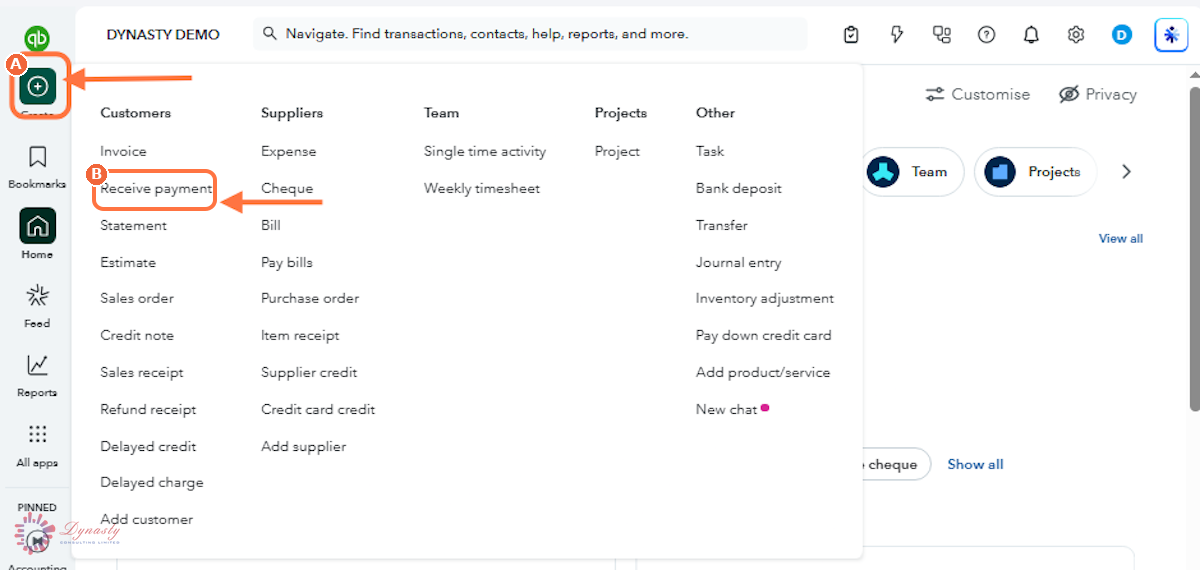
Figure – Opening the Receive Payment form
Step 2 – Complete the Payment Details and Save
A Customer – Select the customer who made the payment. Their outstanding transactions appear below.
B Payment Date – Enter or confirm the date the payment was received.
C Reference no. – A reference such as a cheque or transaction number, to identify and trace the payment.
D Deposit To – The account where the payment is deposited — here, Absa Bank.
E Outstanding invoice – Tick the invoice or invoices the payment settles.
F Payment amount – Confirm the amount applied to each ticked invoice. Amount to Apply and Amount to Credit below should match what was received.
G Save and close – Saves the payment and updates the customer’s outstanding balance.
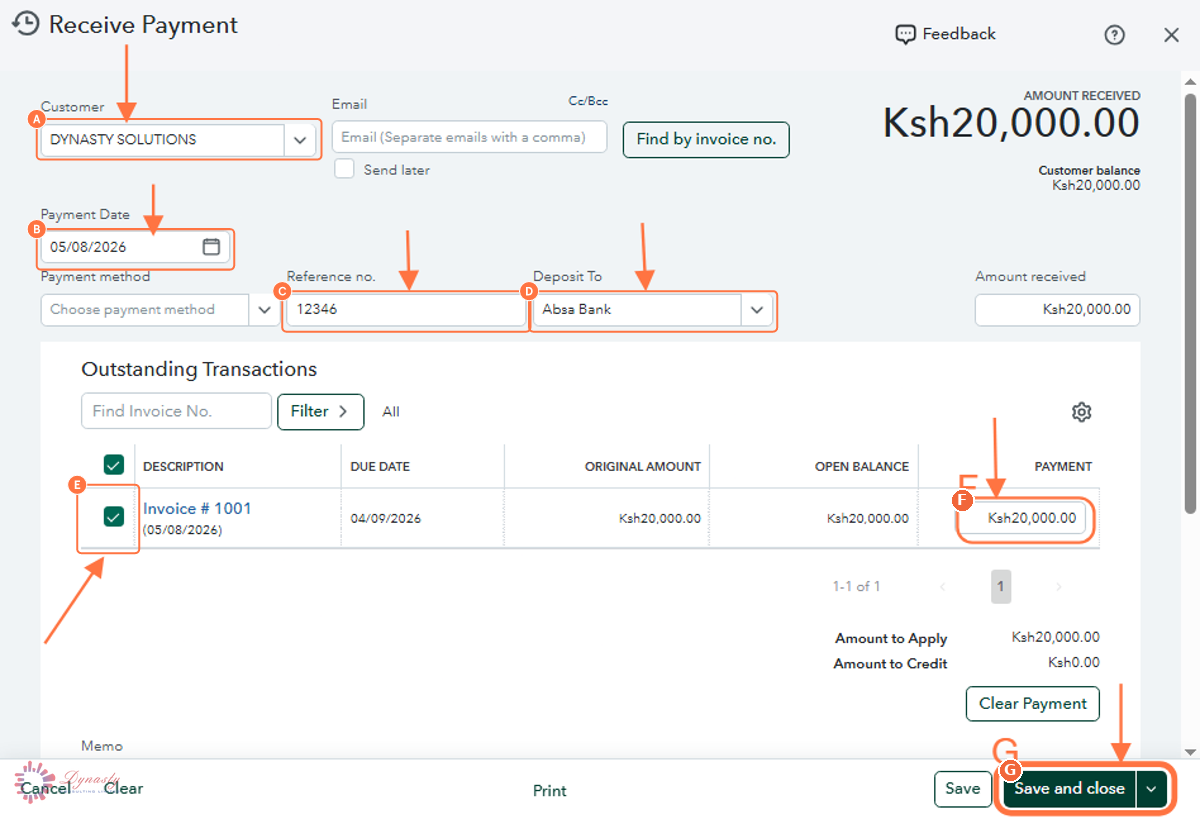
Figure – Completing and applying the payment
How to Receive Payment in QuickBooks Online
Recording a customer payment applies the money against their outstanding invoices, keeping accounts receivable up to date and your records accurate. QuickBooks marks the invoice paid and posts the money to the account you choose.
Last Updated
Aug 19, 2026
Software
QuickBooks Online 2026
What You Will Learn
By the end of this guide you will be able to open the Receive Payment form, complete the payment details, apply the payment to the right invoice, and save the transaction.
Before You Begin
The customer’s invoice must already exist in QuickBooks Online — a received payment is applied against outstanding invoices. Know which account the money was banked into.
Tip
Always tick the exact invoice the customer paid rather than leaving QuickBooks to spread the amount — it keeps customer statements clean and disputes short.
Step 1 – Open the Receive Payment Form
There are no comments for now.
to be the first to leave a comment.