How to Inactivate an Account in the Chart of Accounts — QuickBooks Online
How to Inactivate an Account in the Chart of Accounts — QuickBooks Online
When you no longer need an account — perhaps it is obsolete, a bank account was closed, or a category was merged — make it inactive rather than deleting it. Inactivating preserves all the historical transactions while removing the account from your active lists, keeping the books clean.
Step 1 – Open Settings
Click the Settings (gear) icon in the top-right corner of the navigation bar, immediately to the right of the search bar.
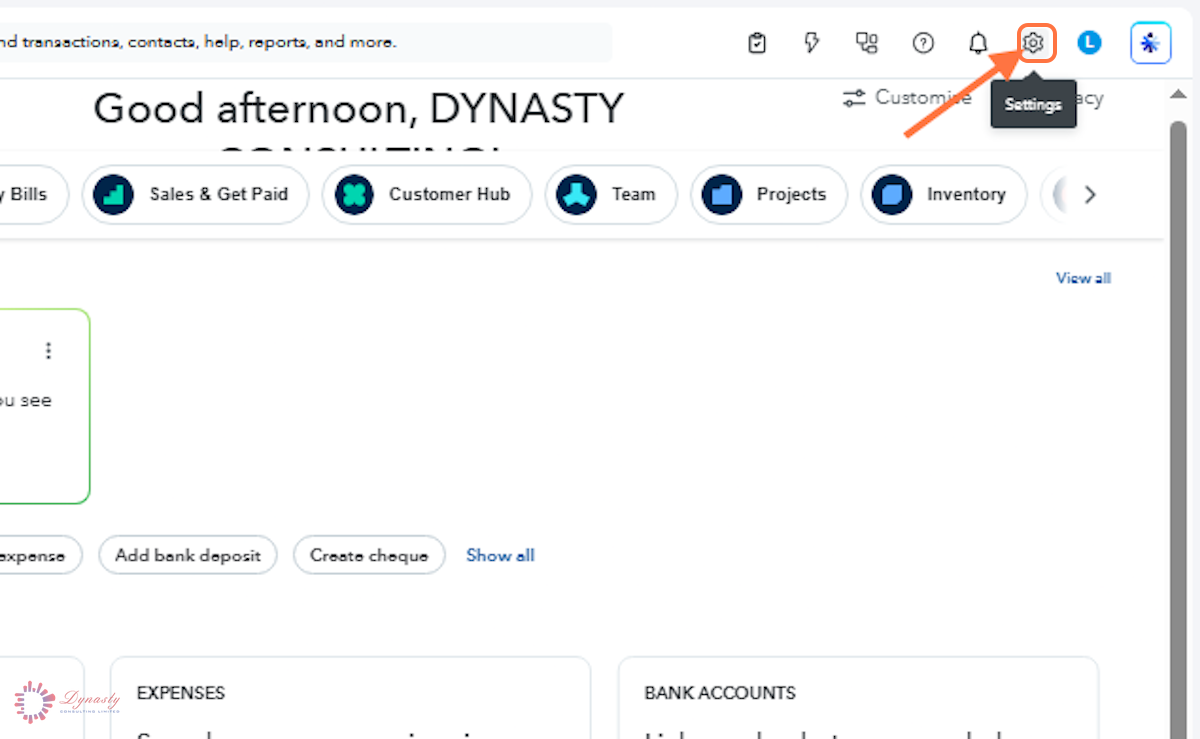
Figure – Opening Settings
Step 2 – Open the Chart of Accounts
In the Settings menu, select Chart of accounts under the YOUR COMPANY section.
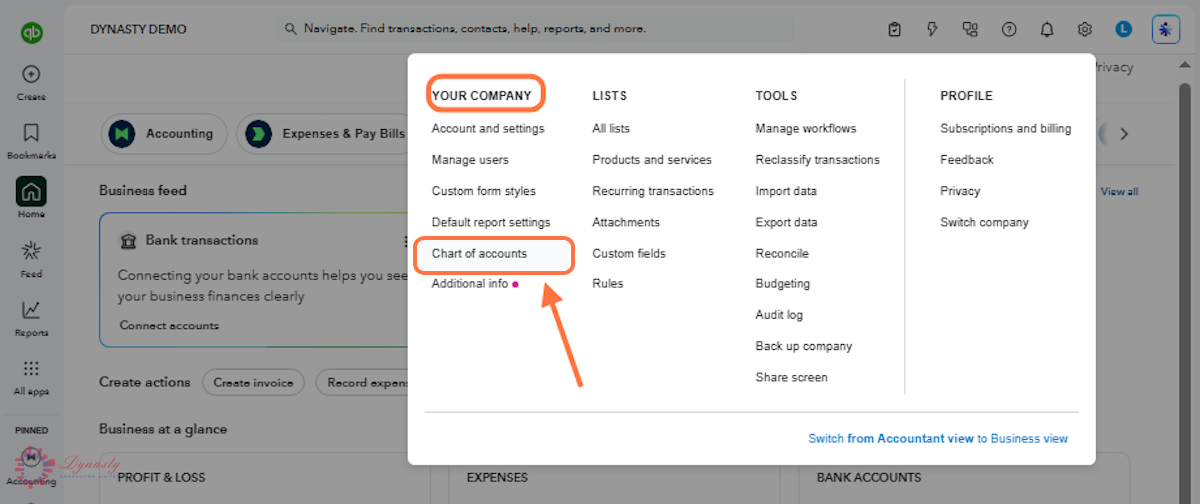
Figure – Opening the Chart of Accounts
Step 3 – Choose Make Inactive
A Select the account – Find the account you want to make inactive in the list.
B Drop-down arrow – Click the arrow at the far right of the row, under the ACTION column.
C Make inactive (reduces usage) – Choose this option from the menu.
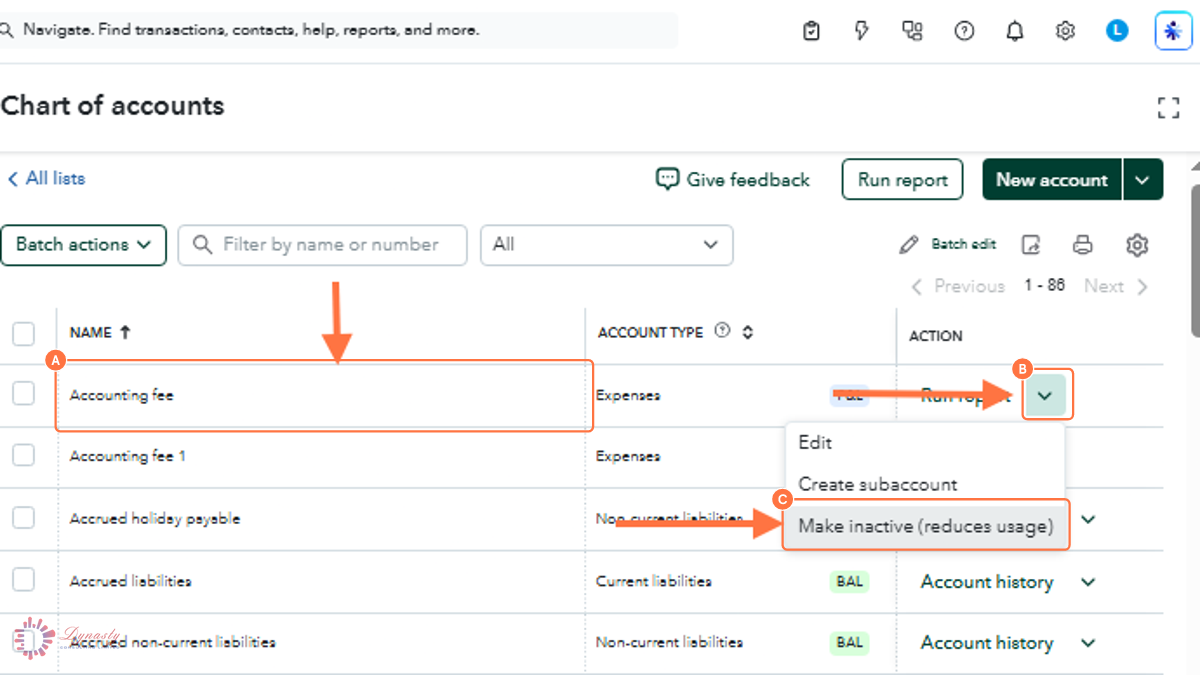
Figure – Choosing Make inactive
Step 4 – Confirm the Change
QuickBooks confirms what happens: pending transactions on the account are completed, existing transactions are unchanged, and the account is not deleted — you can make it active again at any time. Click Yes, make inactive to finish.
The account no longer appears when posting transactions.
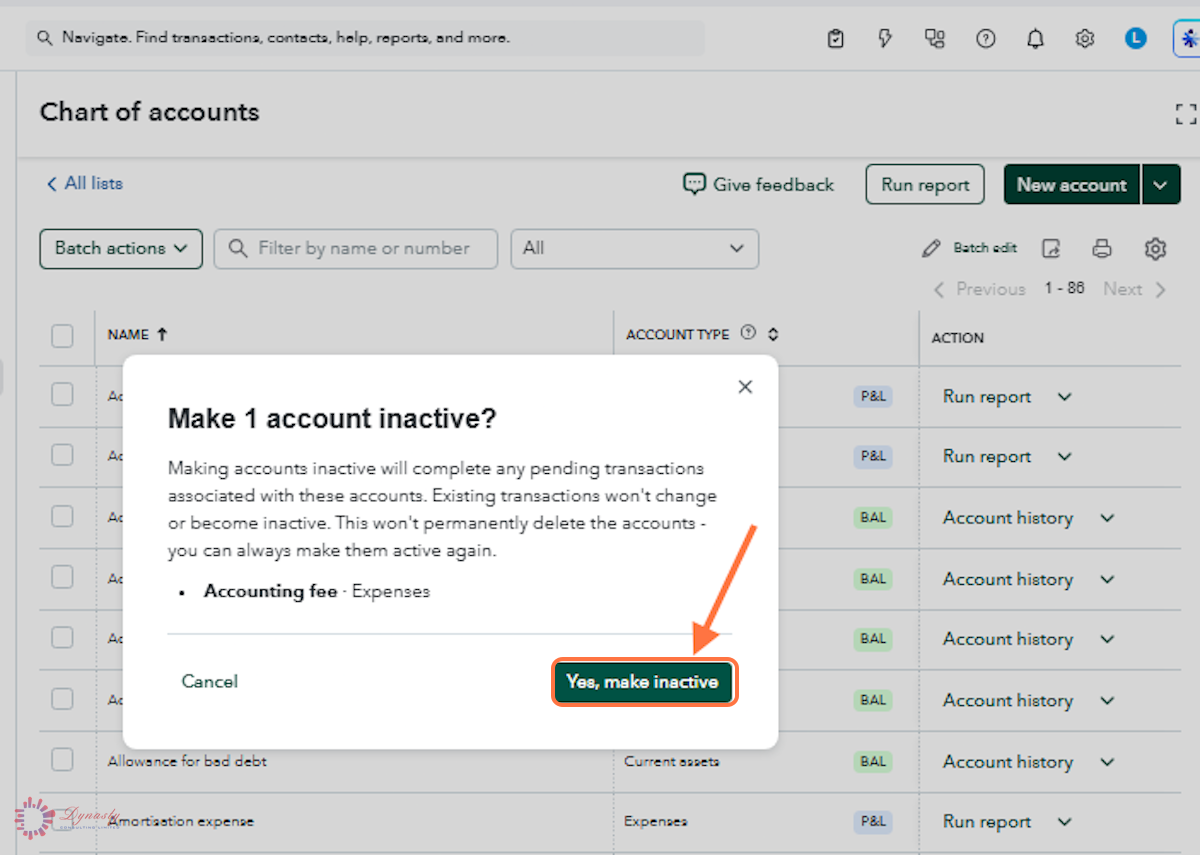
Figure – Confirming the change
How to Inactivate an Account in the Chart of Accounts — QuickBooks Online
When you no longer need an account — perhaps it is obsolete, a bank account was closed, or a category was merged — make it inactive rather than deleting it. Inactivating preserves all the historical transactions while removing the account from your active lists, keeping the books clean.
Last Updated
Aug 19, 2026
Software
QuickBooks Online 2026
What You Will Learn
By the end of this guide you will be able to find an account in the Chart of Accounts, make it inactive, and confirm the change.
Before You Begin
You need administrator or accountant access. A balance-sheet account must have a zero balance before you inactivate it — otherwise QuickBooks posts an adjustment, and the difference lands in your profit and loss.
Important
Bring a balance-sheet account to a zero balance before inactivating it. If a balance remains, QuickBooks posts the difference to profit and loss as an adjustment.
Step 1 – Open Settings
There are no comments for now.
to be the first to leave a comment.