How to Create a Chart of Accounts in QuickBooks Online
How to Create a Chart of Accounts in QuickBooks Online
A Chart of Accounts in QuickBooks Online is the complete list of accounts your business uses to record financial transactions. It organises assets, liabilities, equity, income and expenses, making it easier to manage your finances and produce accurate financial reports.
Step 1 – Open Settings
Click the Settings (gear) icon in the top-right corner of the navigation bar, next to the profile icon.
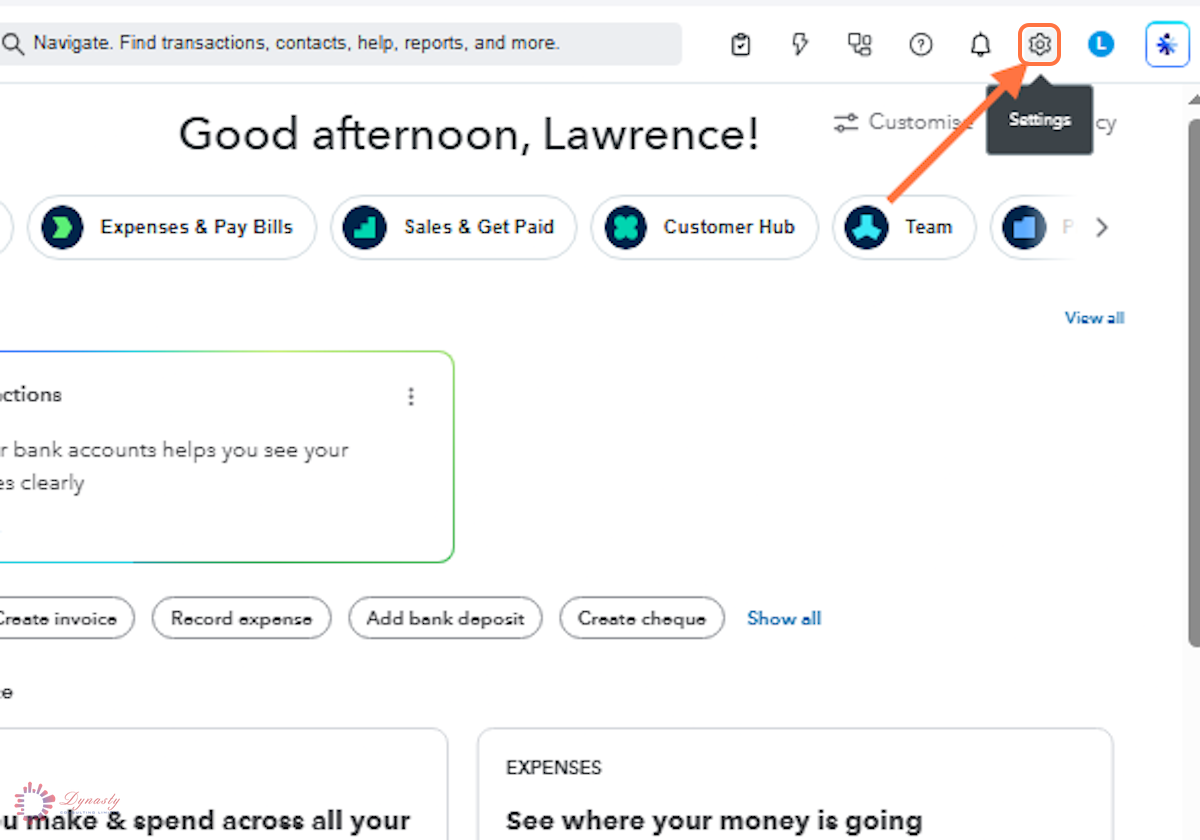
Figure – Opening Settings
Step 2 – Open the Chart of Accounts
In the Settings menu, select Chart of accounts under the YOUR COMPANY section.
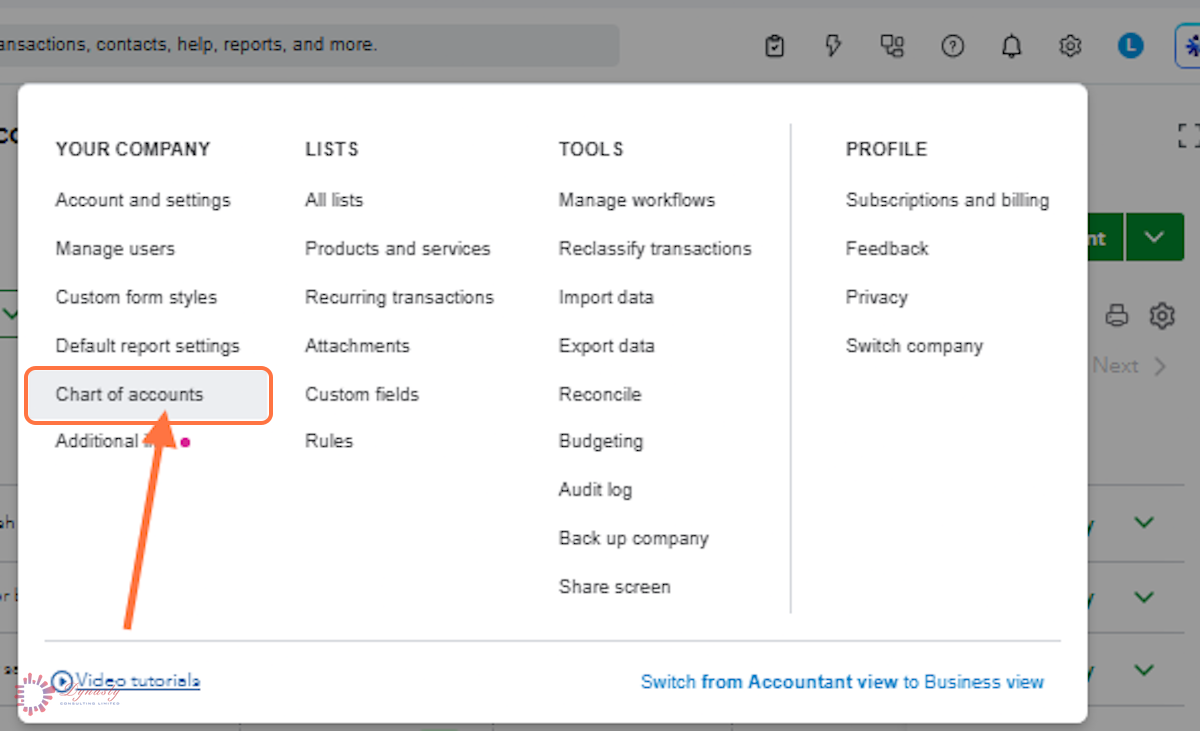
Figure – Opening the Chart of Accounts
Step 3 – Click New Account
Click New account at the top-right of the account list to begin creating the account.
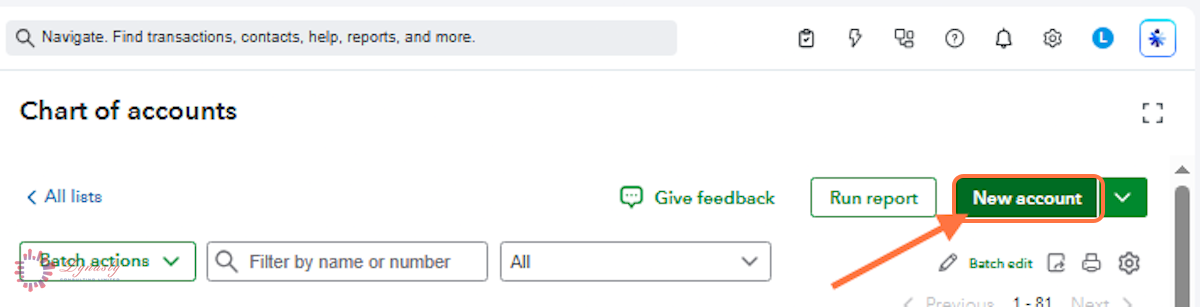
Figure – Starting a new account
Step 4 – Complete the Account Details and Save
A Account name – Enter a clear, descriptive name for the account.
B Account number – Enter the number the account takes in your numbering scheme (optional but recommended).
C Account type – Choose the major category — asset, liability, equity, income or expense. It decides which financial statement the account appears on.
D Detail type – Choose the sub-category that best describes the account within its type.
E Description – Optional internal note giving context about the account. It does not appear on standard financial reports.
F Save – Click Save to create the account and add it to the list.
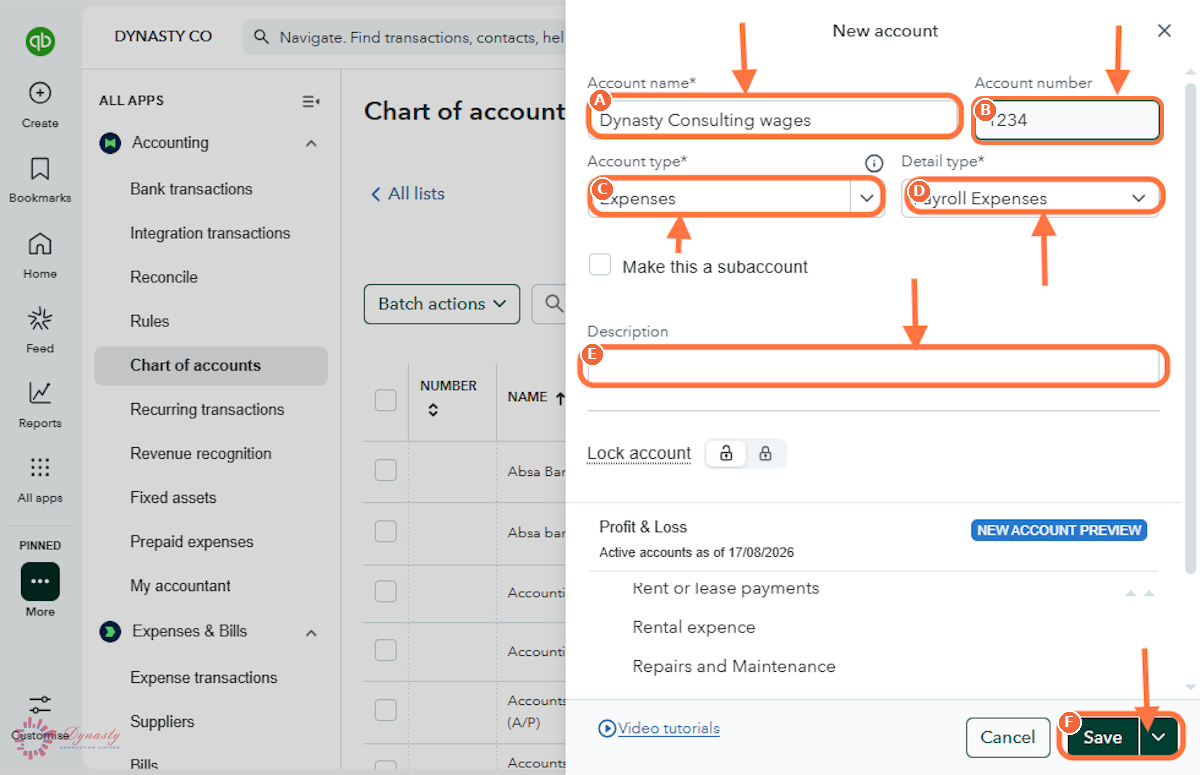
Figure – Completing the new account form
How to Create a Chart of Accounts in QuickBooks Online
A Chart of Accounts in QuickBooks Online is the complete list of accounts your business uses to record financial transactions. It organises assets, liabilities, equity, income and expenses, making it easier to manage your finances and produce accurate financial reports.
Last Updated
Aug 19, 2026
Software
QuickBooks Online 2026
What You Will Learn
By the end of this guide you will be able to open the Chart of Accounts, start a new account, and complete its name, number, type, detail type and description before saving it.
Before You Begin
You need administrator or accountant access, because new accounts change the company’s books. Decide the account type and detail type before you start — they control where the account appears on reports.
Tip
Use clear, consistent account names and numbers. A tidy numbering scheme (for example 1000s for assets, 2000s for liabilities, 4000s for income, 5000s for expenses) keeps the list easy to scan as it grows.
Step 1 – Open Settings
There are no comments for now.
to be the first to leave a comment.