How to Add an Item — Non-Inventory in QuickBooks Online
How to Add an Item — Non-Inventory in QuickBooks Online
Non-inventory items are products you buy or sell without tracking the quantity on hand — materials bought for specific jobs, low-value supplies, or goods you sell but never hold in stock. They keep sales and purchases consistent without the overhead of stock tracking.
Step 1 – Open Settings
Click the Settings (gear) icon in the upper-right corner of QuickBooks Online, just to the right of the search bar.
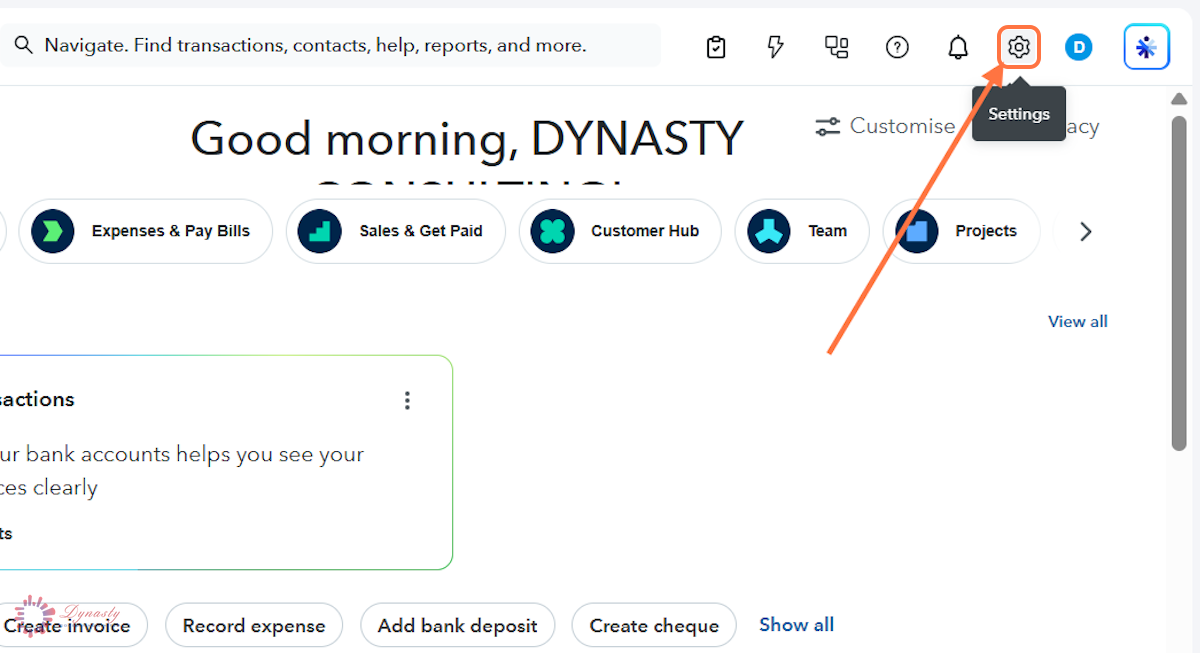
Figure – Opening Settings
Step 2 – Open Products & Services
In the Settings menu, select Products and services under the LISTS section. The Products & Services page opens, where you can view, create, edit and manage all the products and services used in your company.
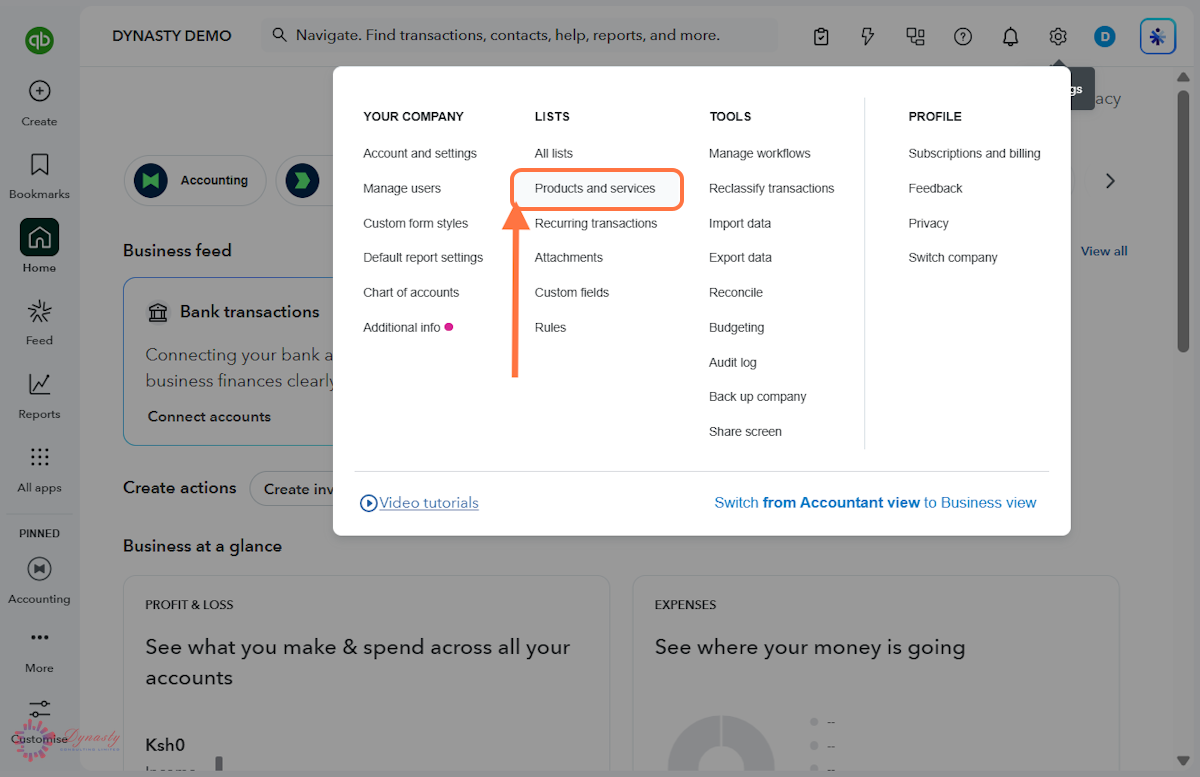
Figure – Opening Products & Services
Step 3 – Start a New Non-Inventory Item
A New product/service – Click the green button at the top-right of the page.
B Non-inventory item – Select Non-inventory item from the drop-down menu.
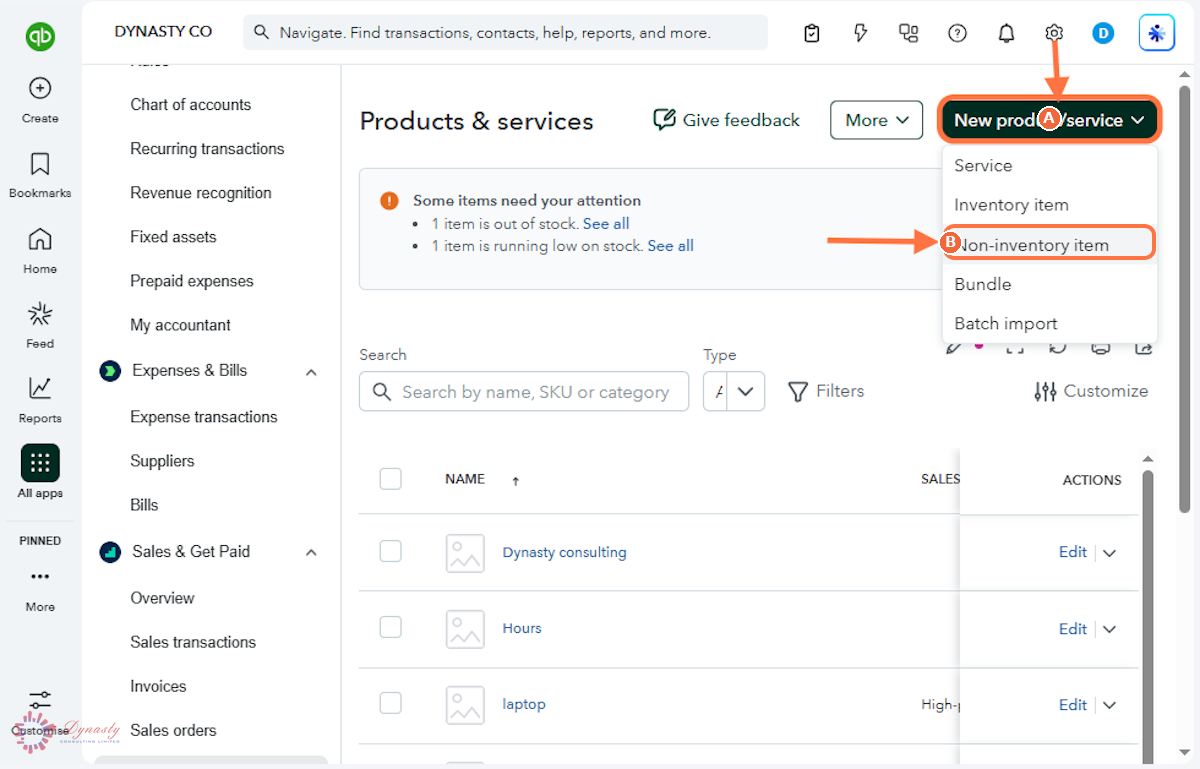
Figure – Choosing the Non-inventory item type
Step 4 – Complete the Basic Information
A Name – Enter a clear, unique name that makes the item easy to identify on invoices, sales receipts and purchase orders.
B Item type – Confirm the type is set to Non-inventory item, so no quantity on hand is tracked.
C SKU – Optional code that uniquely identifies the item for easier tracking.
D Category – Optional grouping that keeps the item easy to locate in the list.
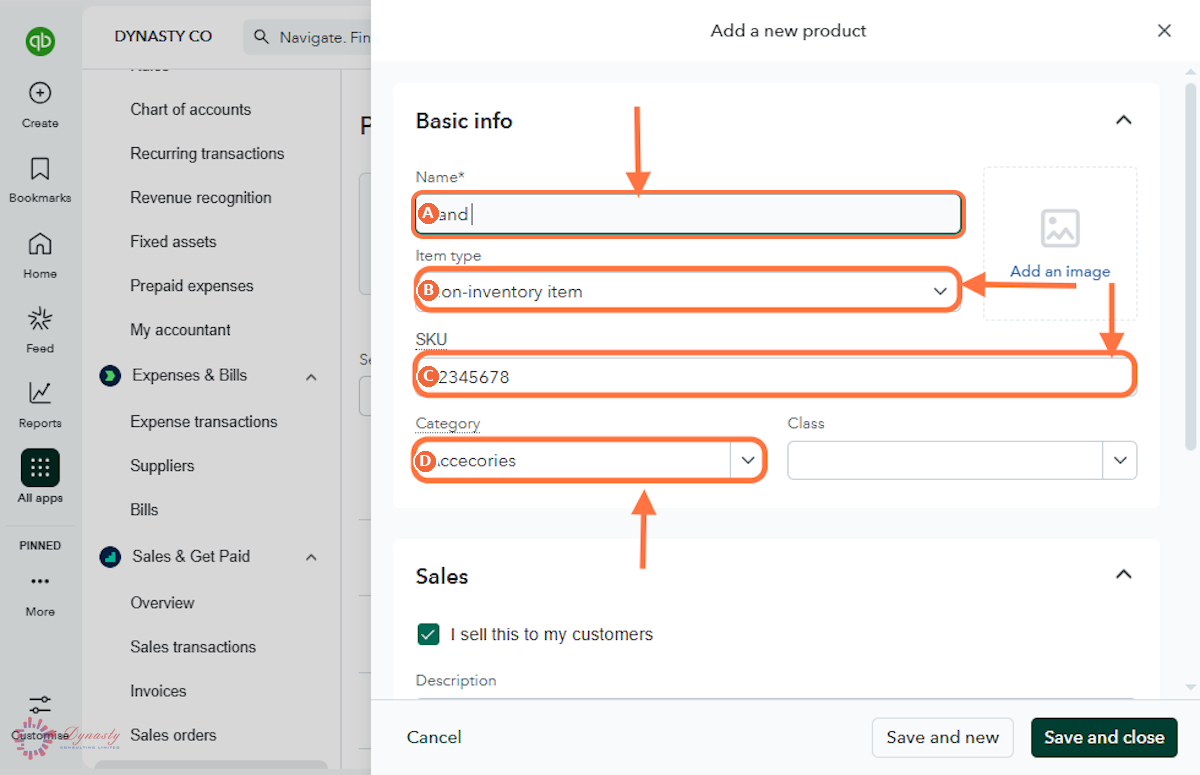
Figure – Completing the basic information
Step 5 – Enter the Sales Information and Save
A I sell this to my customers – Tick this box so the item can be added to sales forms.
B Description – A clear description of the item to identify it on sales forms and invoices.
C Price/rate – The default amount charged when the item is added to a sale, keeping invoicing consistent and accurate.
D Income account – The account where income from the item is recorded, so sales are categorised correctly on reports.
E Save and close – Click to save the item and add it to the Products & Services list.
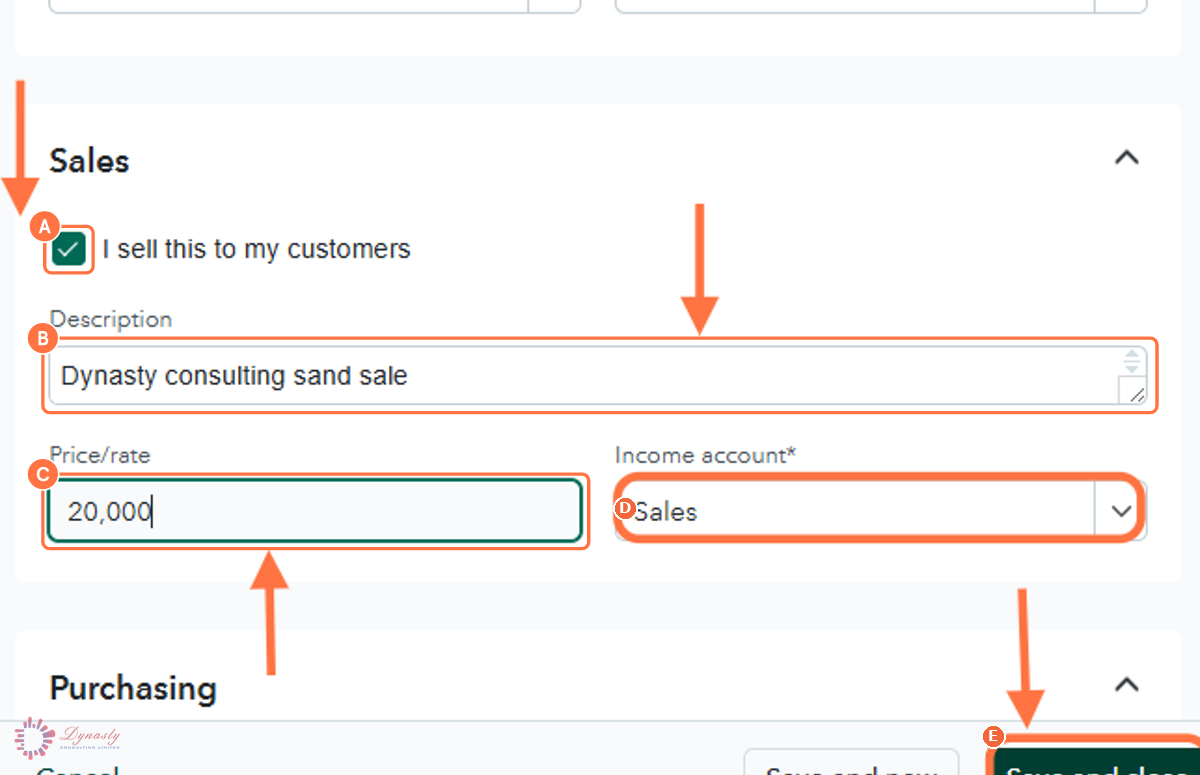
Figure – Entering the sales information
How to Add an Item — Non-Inventory in QuickBooks Online
Non-inventory items are products you buy or sell without tracking the quantity on hand — materials bought for specific jobs, low-value supplies, or goods you sell but never hold in stock. They keep sales and purchases consistent without the overhead of stock tracking.
Last Updated
Aug 19, 2026
Software
QuickBooks Online 2026
What You Will Learn
By the end of this guide you will be able to create a non-inventory item with its name, SKU and category, and set its sales description, price and income account.
Before You Begin
You need permission to manage products and services, and an income account ready for recording the item’s sales.
Tip
Choose Non-inventory rather than Inventory for anything you do not count — you can always create an inventory version later if you start holding stock of it.
Step 1 – Open Settings
There are no comments for now.
to be the first to leave a comment.