How to Create Sub-Accounts in the Chart of Accounts — QuickBooks Online
How to Create Sub-Accounts in the Chart of Accounts — QuickBooks Online
Sub-accounts let you organise the Chart of Accounts in greater detail while keeping your main reports clean. Instead of cluttering the list with dozens of similar accounts, you nest specific categories — such as NSSF or PAYE under Salary and Wages — beneath a single parent account, and their balances roll up into the parent’s total on reports.
Step 1 – Open Settings
Click the Settings (gear) icon in the top-right corner of the navigation bar, immediately to the right of the search bar.
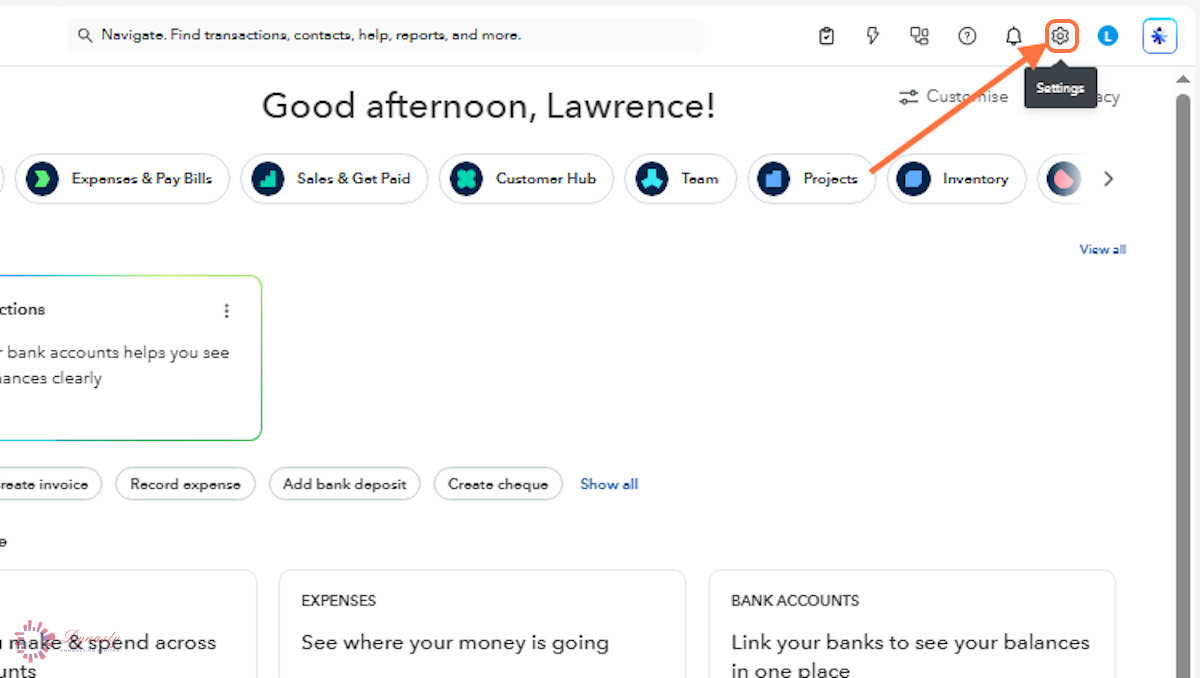
Figure – Opening Settings
Step 2 – Open the Chart of Accounts
In the Settings menu, select Chart of accounts under the YOUR COMPANY section.
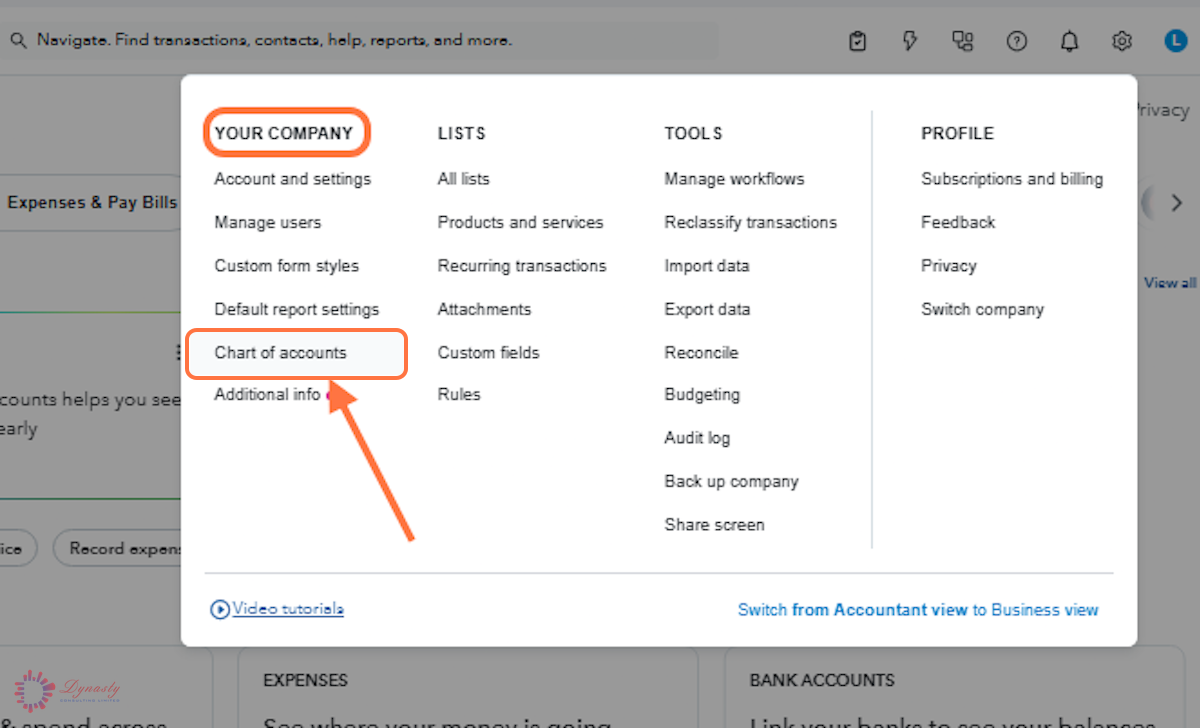
Figure – Opening the Chart of Accounts
Step 3 – Create the Parent Account
Click the green New account button at the top-right of the account list. This first account will be the main (parent) account that the sub-accounts sit under.
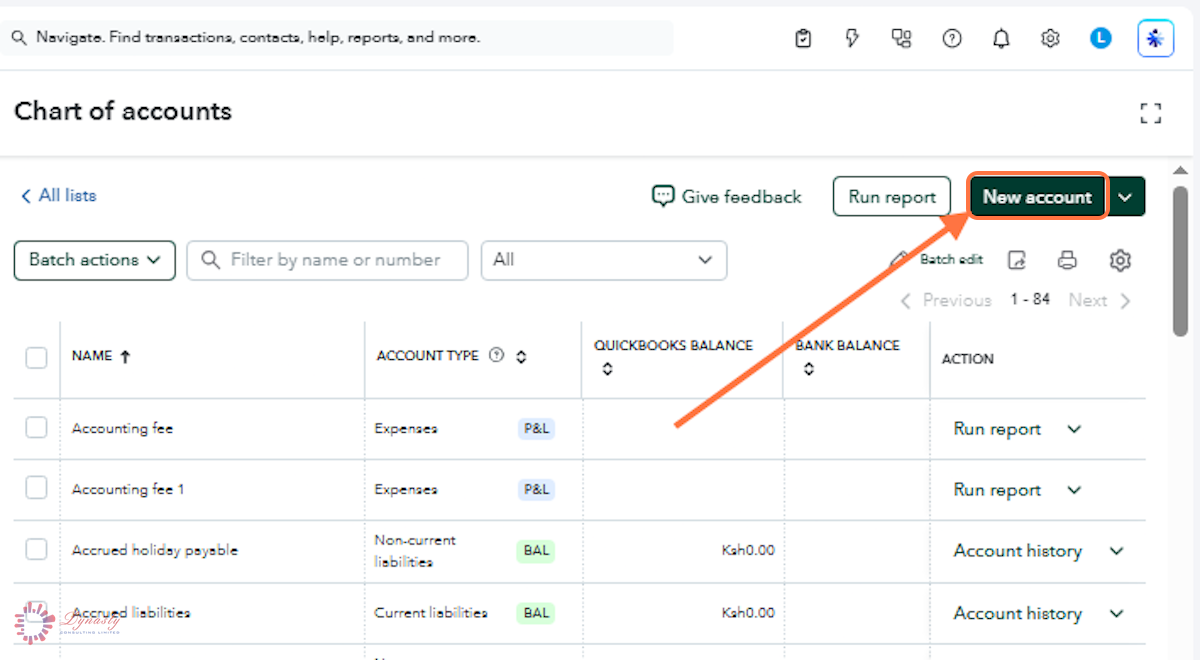
Figure – Starting the parent account
Step 4 – Complete the Parent Account Details and Save
A Account name – Enter the parent account name — in this example, Salary and wages.
B Account type – Choose the correct type. The sub-accounts must use the same type.
C Detail type – Choose the sub-category that best describes the account.
D Description – Optional internal note about what the account holds.
E Save – Click Save to create the parent account.
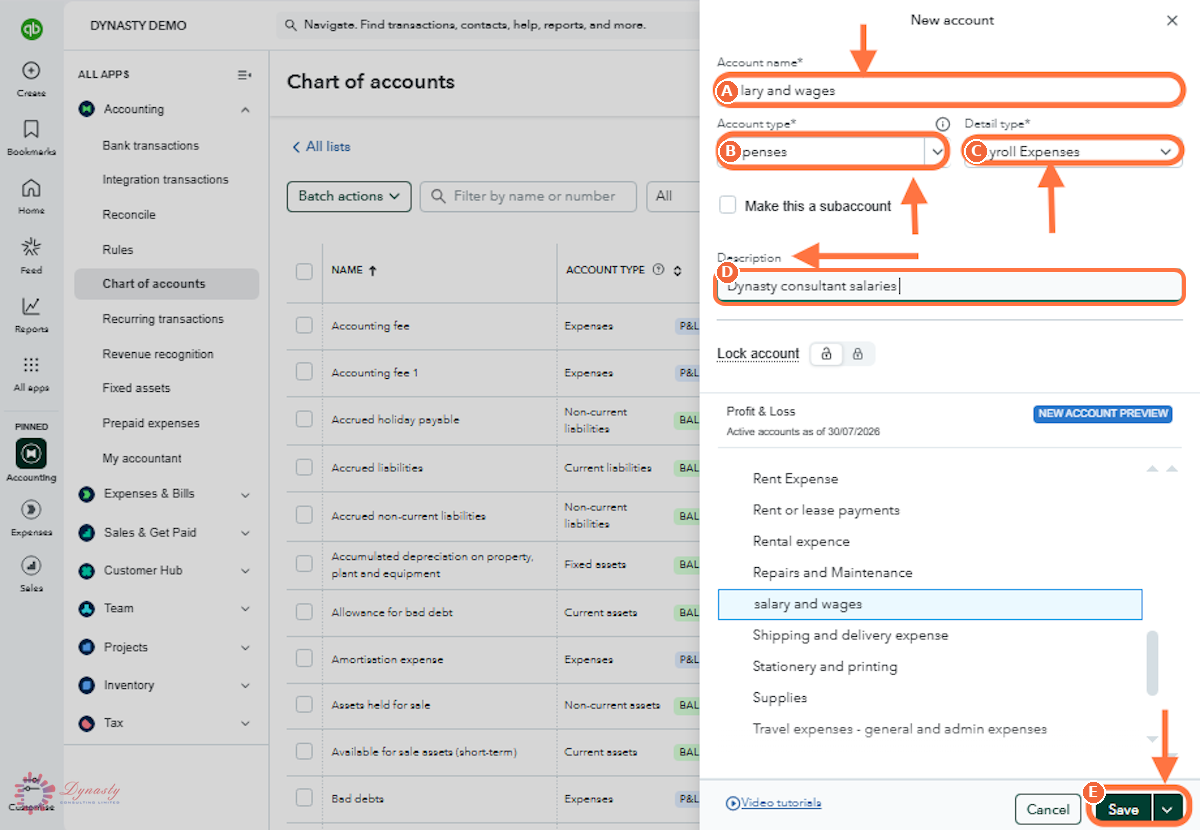
Figure – Completing the parent account
Step 5 – Start the Sub-Account
Back on the Chart of Accounts list, click New account again to begin creating the first sub-account.
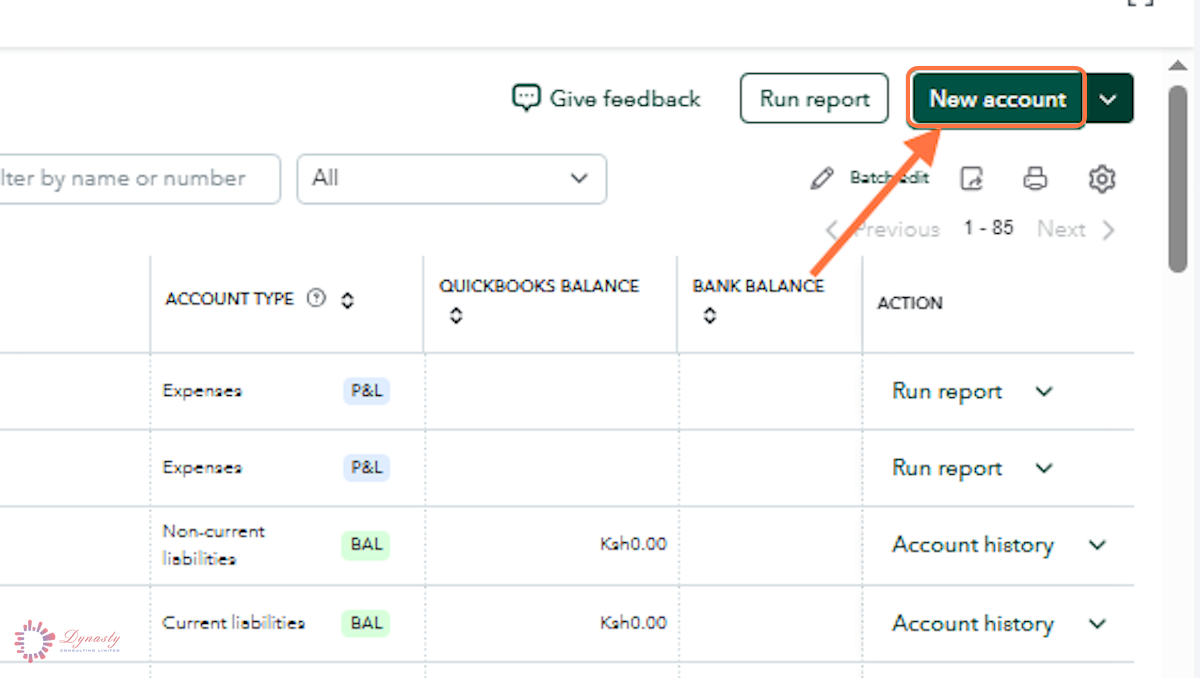
Figure – Starting the sub-account
Step 6 – Complete the Sub-Account Details and Save
A Account name – Enter the sub-account name — in this example, NSSF.
B Account type – Select the same account type as the parent.
C Detail type – Select the same detail type as the parent.
D Make this a subaccount – Tick this box to nest the account under a parent.
E Parent account – Choose the parent account created in Step 4.
F Description – Optional internal note about the sub-account.
G Save – Click Save to create the sub-account.
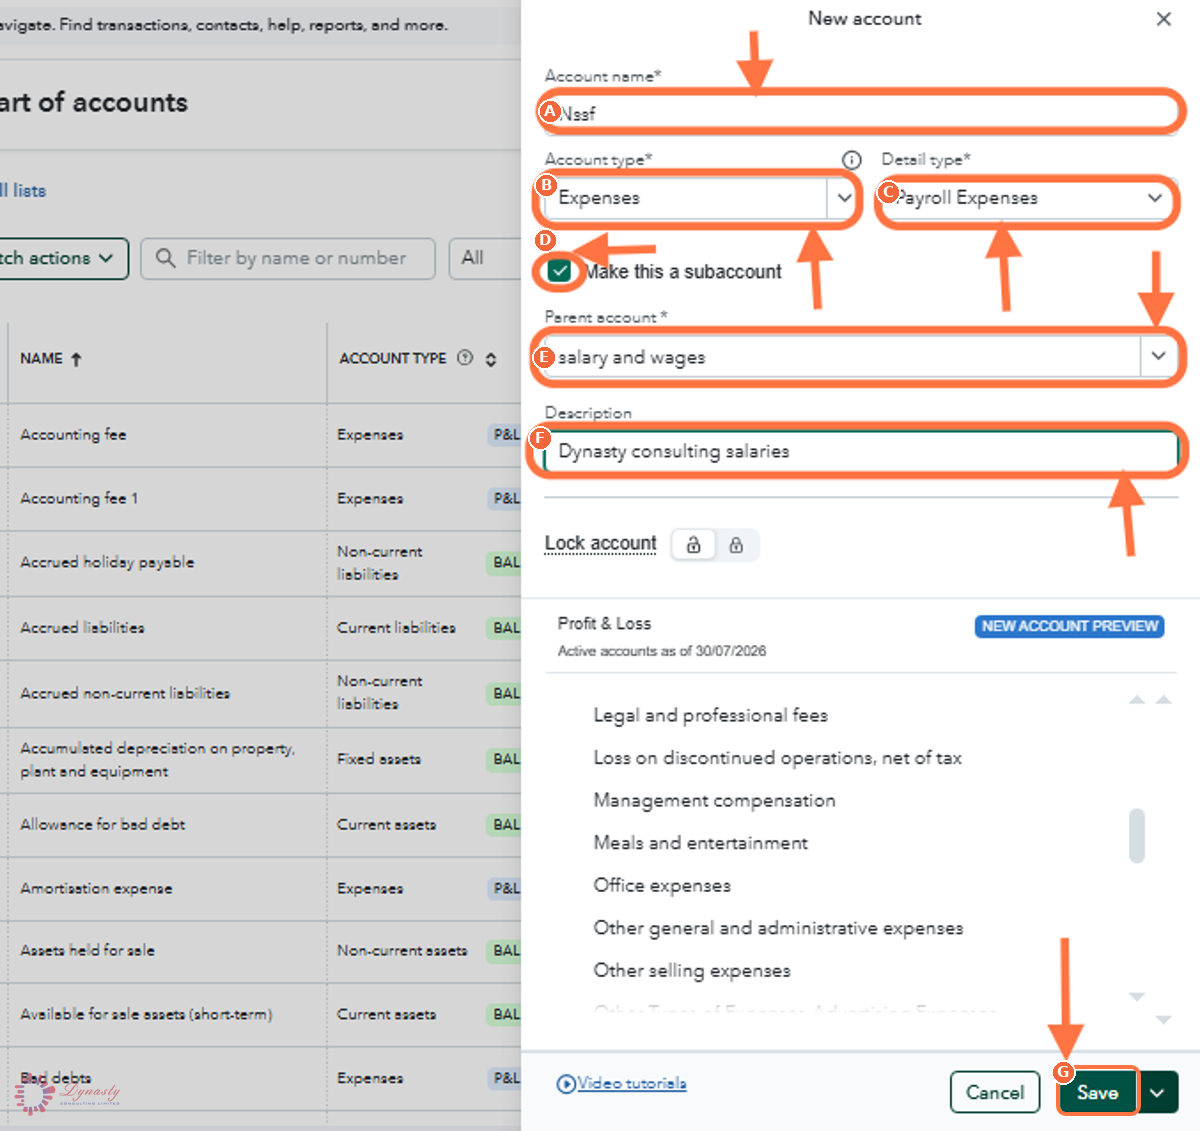
Figure – Completing the sub-account
Step 7 – Lock the Parent Account
QuickBooks asks whether to lock the parent account. Locking is optional but good practice: it keeps the parent empty so every transaction is posted to a specific sub-account, and the sub-account balances still roll up into the parent’s total on reports.
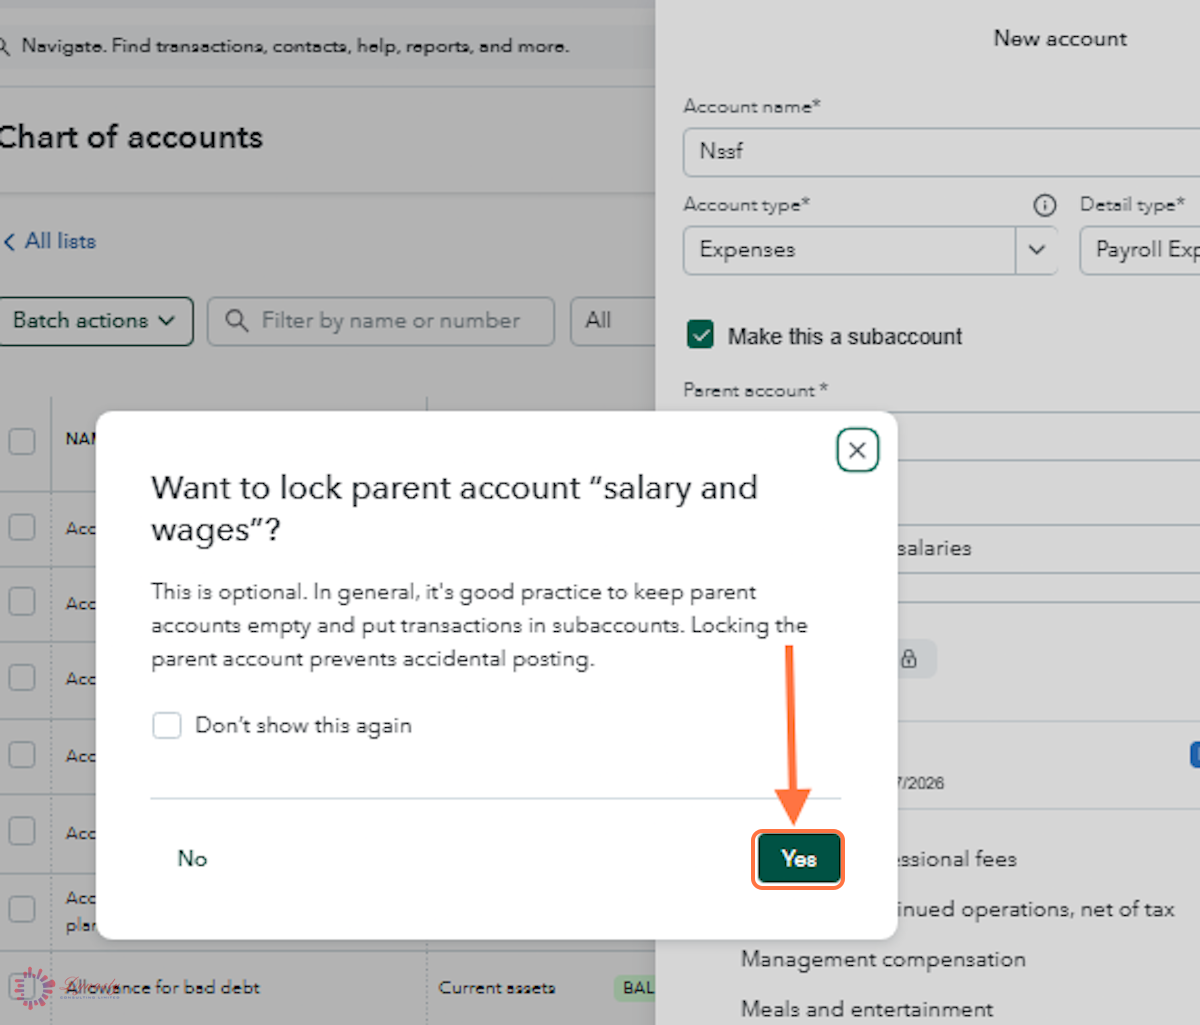
Figure – Locking the parent account
How to Create Sub-Accounts in the Chart of Accounts — QuickBooks Online
Sub-accounts let you organise the Chart of Accounts in greater detail while keeping your main reports clean. Instead of cluttering the list with dozens of similar accounts, you nest specific categories — such as NSSF or PAYE under Salary and Wages — beneath a single parent account, and their balances roll up into the parent’s total on reports.
Last Updated
Aug 19, 2026
Software
QuickBooks Online 2026
What You Will Learn
By the end of this guide you will be able to create a parent account, create a sub-account beneath it, link the two with the "Make this a subaccount" option, and lock the parent so transactions are only posted to the sub-accounts.
Before You Begin
You need administrator or accountant access. A sub-account must have the same account type and detail type as its parent, so create or identify the parent account first.
Tip
Post transactions to sub-accounts only and keep the parent account empty. QuickBooks totals the sub-accounts into the parent automatically on reports.
Step 1 – Open Settings
There are no comments for now.
to be the first to leave a comment.