How to Add an Item — Service in QuickBooks Online
How to Add an Item — Service in QuickBooks Online
A Service item in QuickBooks Online records the services your business provides, such as consulting, installation, repairs or professional fees. Creating service items lets you invoice customers quickly, keep pricing consistent, and track service income accurately.
Step 1 – Open Settings
Click the Settings (gear) icon in the upper-right corner of QuickBooks Online, just to the right of the search bar.
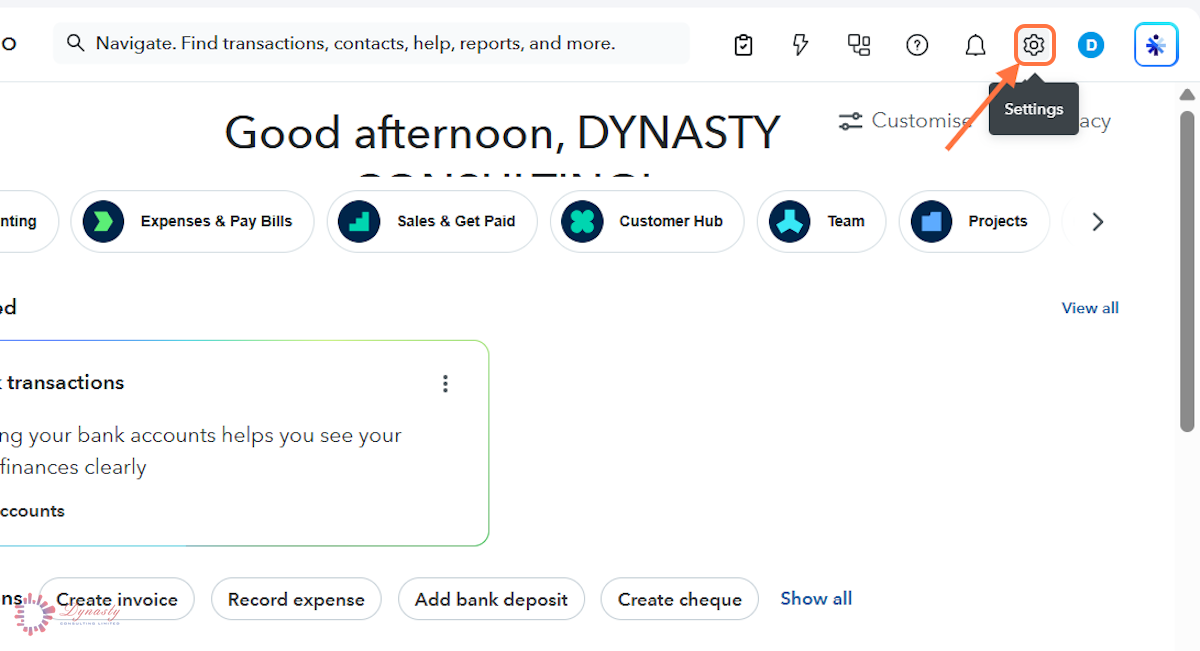
Figure – Opening Settings
Step 2 – Open Products & Services
In the Settings menu, select Products and services under the LISTS section. The Products & Services page opens, where you can view, create, edit and manage all the products and services used in your company.
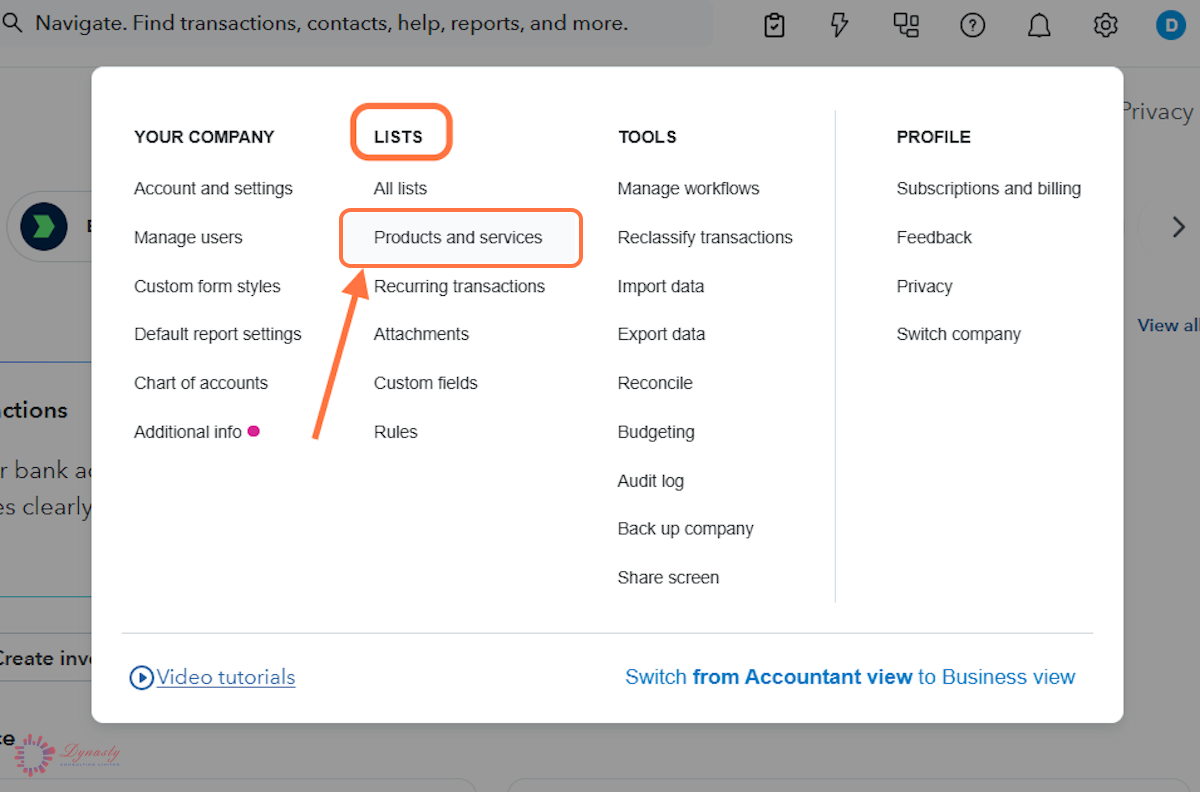
Figure – Opening Products & Services
Step 3 – Click New Product/Service
Click New product/service at the top-right of the Products & Services page.
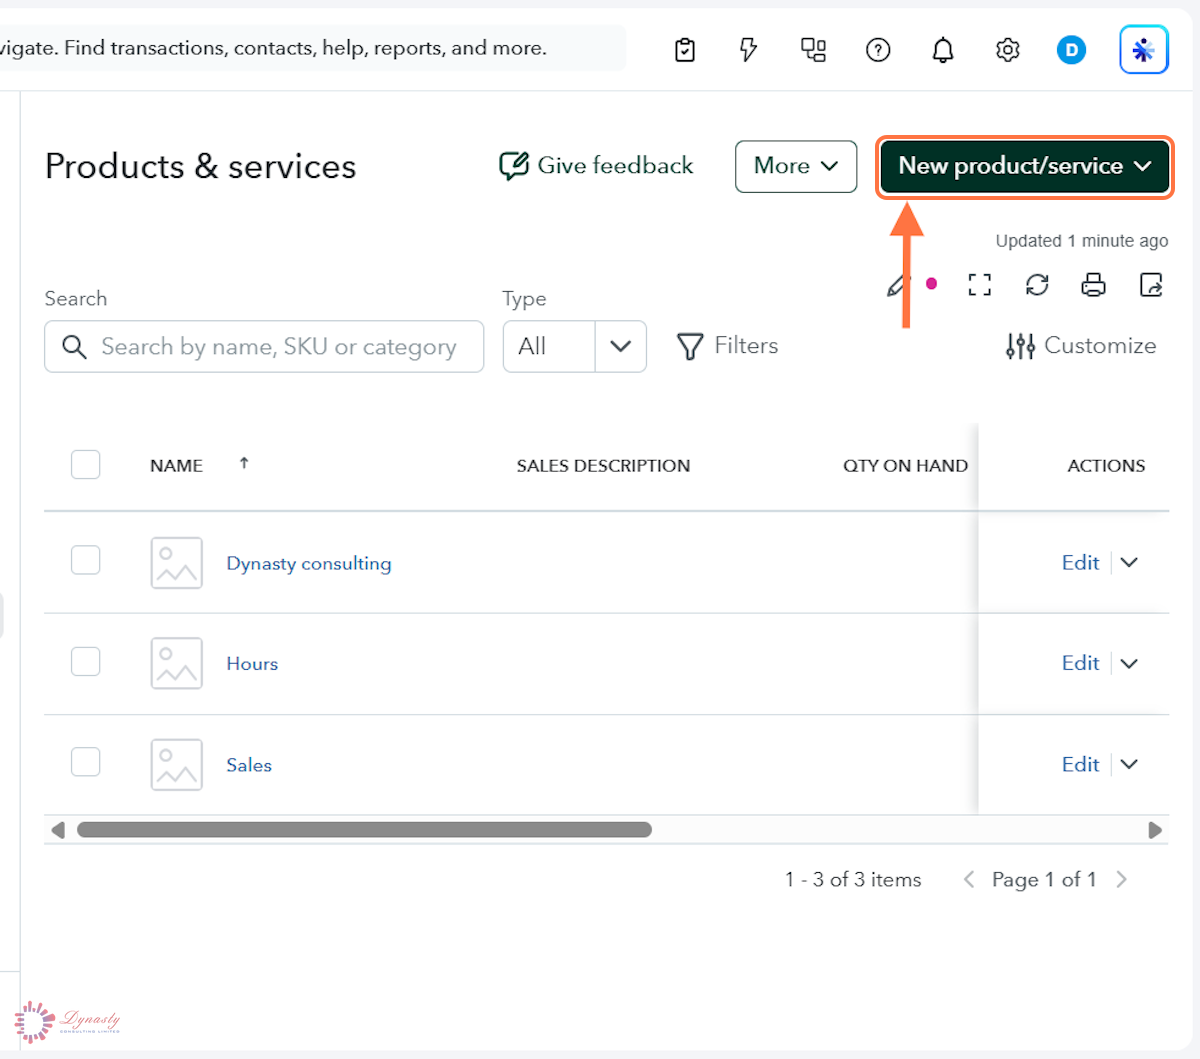
Figure – Starting a new item
Step 4 – Select Service
From the menu that opens — Service, Inventory item, Non-inventory item, Bundle, Batch import — select Service.
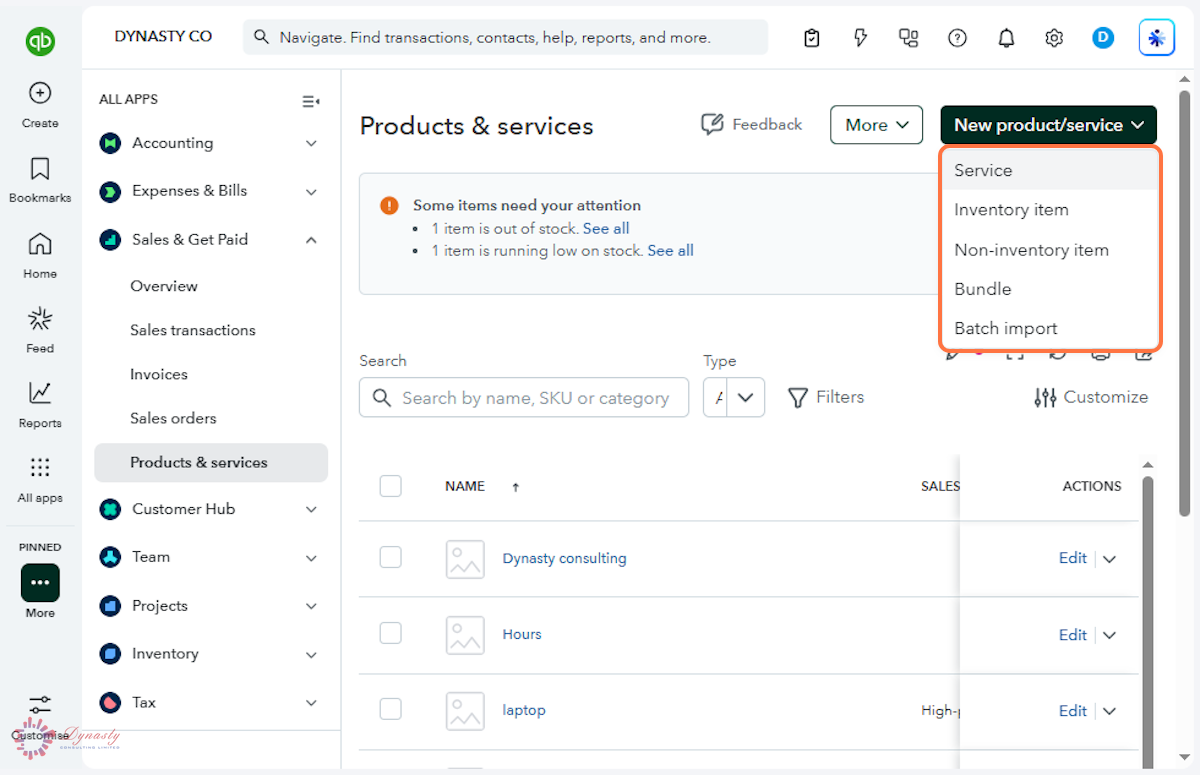
Figure – Choosing the Service item type
Step 5 – Complete the Basic Information
A Name – Enter a unique, descriptive name that makes the service easy to find when raising invoices, estimates and sales receipts.
B Item type – Confirm the type is set to Service. The item type controls how QuickBooks treats the item in transactions and reports.
C SKU – Optional identification code that helps you organise and search a large item list. Leave it blank if your business does not use SKUs.
D Category – Optional grouping that keeps the Products & Services list organised and makes reports easier to read.
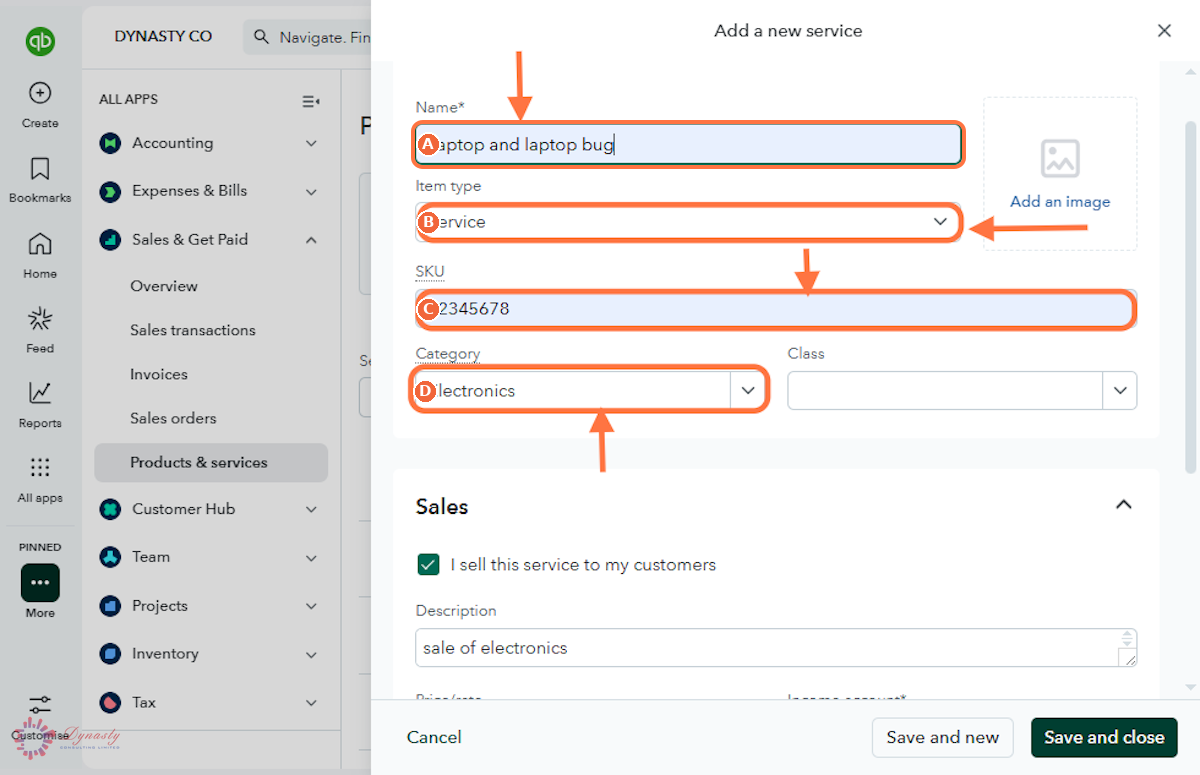
Figure – Completing the basic information
Step 6 – Enter the Sales Information and Save
A I sell this service to my customers – Tick this box so the service can be added to sales forms.
B Description – A brief explanation of the service. It can appear automatically on customer invoices and other sales forms.
C Price/rate – The standard amount you charge. It fills in automatically whenever the service is added to a sale.
D Income account – The account where revenue from this service is recorded — choose carefully so your reports stay accurate.
E Save – Click Save at the bottom-right of the form to create the service and add it to the Products & Services list.
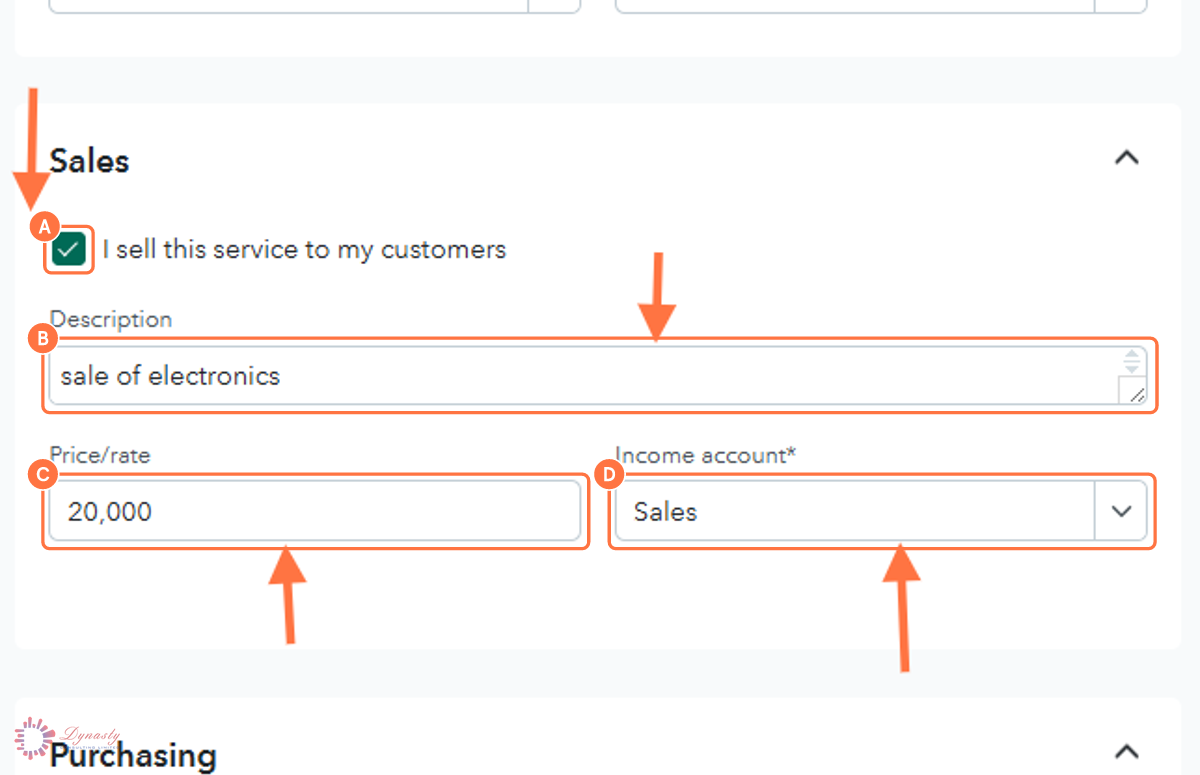
Figure – Entering the sales information
How to Add an Item — Service in QuickBooks Online
A Service item in QuickBooks Online records the services your business provides, such as consulting, installation, repairs or professional fees. Creating service items lets you invoice customers quickly, keep pricing consistent, and track service income accurately.
Last Updated
Aug 19, 2026
Software
QuickBooks Online 2026
What You Will Learn
By the end of this guide you will be able to open Products & Services, start a new Service item, complete its basic information, and set its sales price and income account before saving.
Before You Begin
You need permission to manage products and services, and an income account ready in the Chart of Accounts to record the service’s revenue.
Tip
Name services the way your customers know them — the name and description appear on invoices and estimates exactly as you type them here.
Step 1 – Open Settings
There are no comments for now.
to be the first to leave a comment.