How to Create a Credit Note in QuickBooks Online
How to Create a Credit Note in QuickBooks Online
A credit note issues a refund or credit to a customer for returned items, overpayments, pricing adjustments or other billing corrections. It reduces the customer’s balance and keeps both their account and your financial records accurate.
Step 1 – Open a New Credit Note
A Create (+) – Click the Create button at the top of the left navigation bar to open the transaction menu.
B Credit note – Select Credit note under the Customers column.
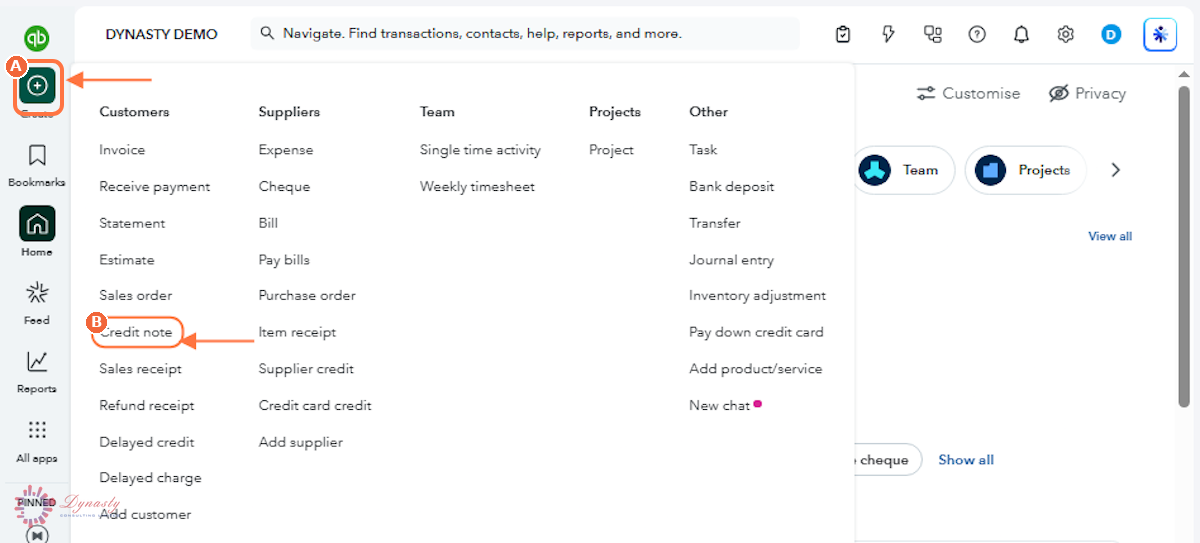
Figure – Opening a new credit note
Step 2 – Complete the Credit Note Details and Save
A Customer – Select the customer receiving the credit.
B Credit Note Date – Enter or confirm the date the credit is issued.
C Credit Note no. – Review the automatically generated number, or enter your own if required.
D Product/service – Select the product or service being credited — use the same item as the original sale so the income account is reversed correctly.
E Description – Explain clearly what is being credited. This description appears on the credit note the customer receives.
F Qty – The quantity of items or services being credited.
G Rate – The unit price of the credited item — normally the price on the original invoice.
H Amount – Review the calculated credit amount before saving.
I Save and send – Saves the credit note, updates the customer’s available credit, and emails it to them. Use the arrow beside the button for Save and close instead.
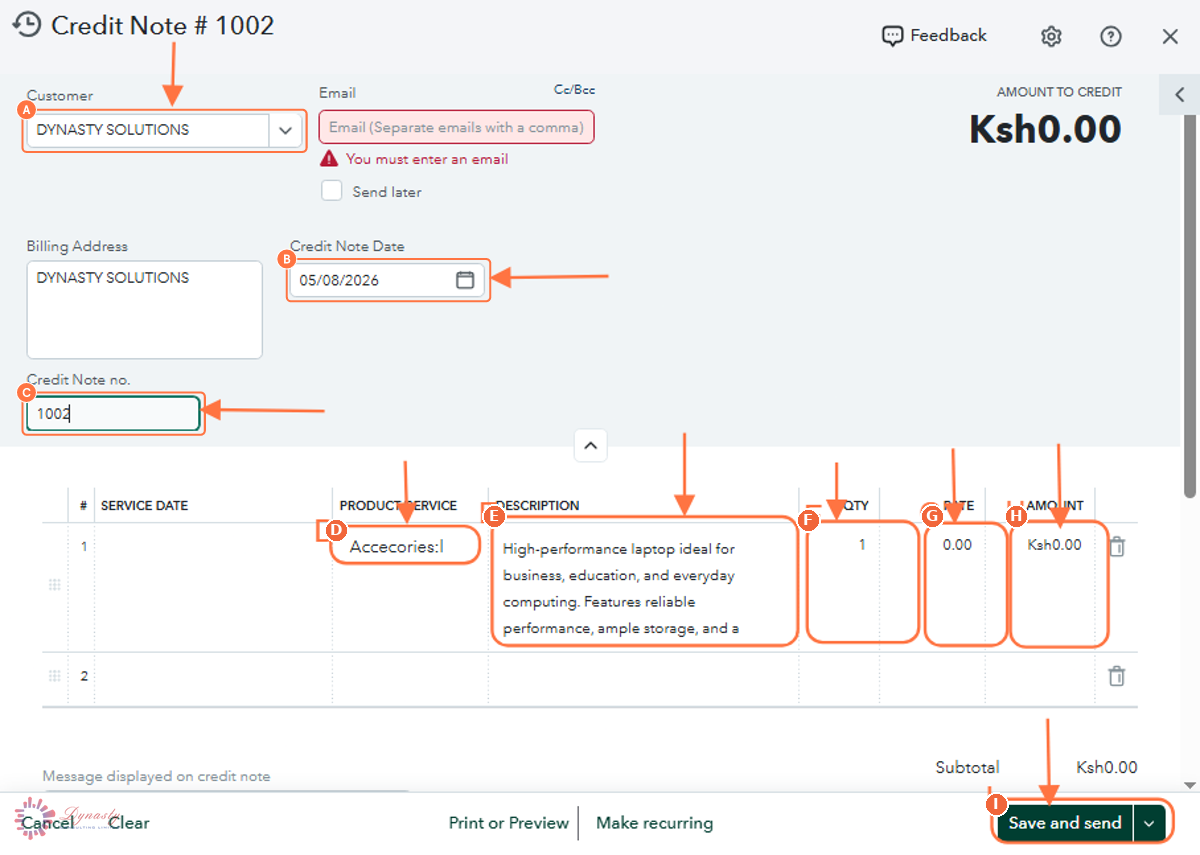
Figure – Completing the credit note
How to Create a Credit Note in QuickBooks Online
A credit note issues a refund or credit to a customer for returned items, overpayments, pricing adjustments or other billing corrections. It reduces the customer’s balance and keeps both their account and your financial records accurate.
Last Updated
Aug 19, 2026
Software
QuickBooks Online 2026
What You Will Learn
By the end of this guide you will be able to open a new credit note, complete the customer and credit details, add the items being credited, and save or send the credit note.
Before You Begin
Know which invoice or sale the credit relates to, and use the same product or service item on the credit note so the income account is reversed correctly.
Tip
After saving, apply the credit against the customer’s next invoice from the Receive Payment screen — an unapplied credit sits on their account until it is used or refunded.
Step 1 – Open a New Credit Note
There are no comments for now.
to be the first to leave a comment.