
How to Update Company Details in QuickBooks Online
Your company details appear on invoices, statements and other customer-facing forms, and they identify the business inside QuickBooks Online. Keeping them current means every document you send carries the right name, address and contact information.
Step 1 – Open Settings
Click the Settings (gear) icon in the upper-right corner of QuickBooks Online.
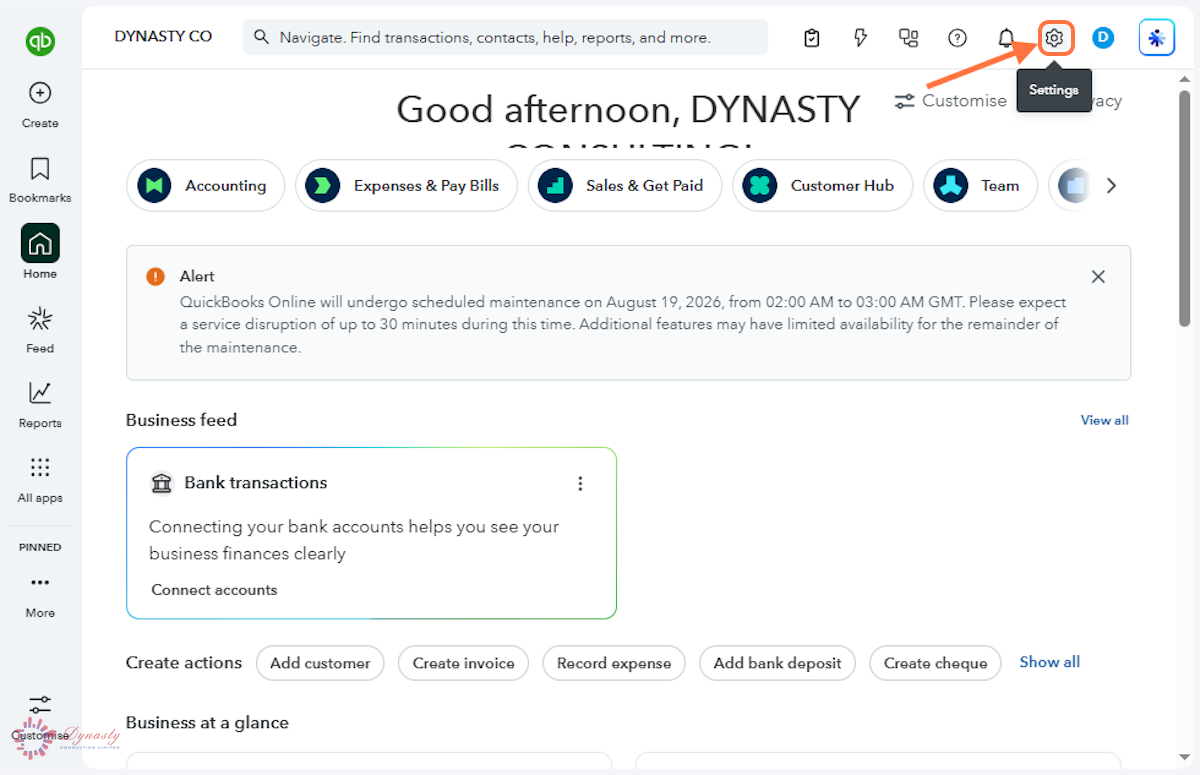
Figure – Opening Settings
Step 2 – Open Account and Settings
Under YOUR COMPANY in the Settings menu, select Account and settings. The Company tab opens first.
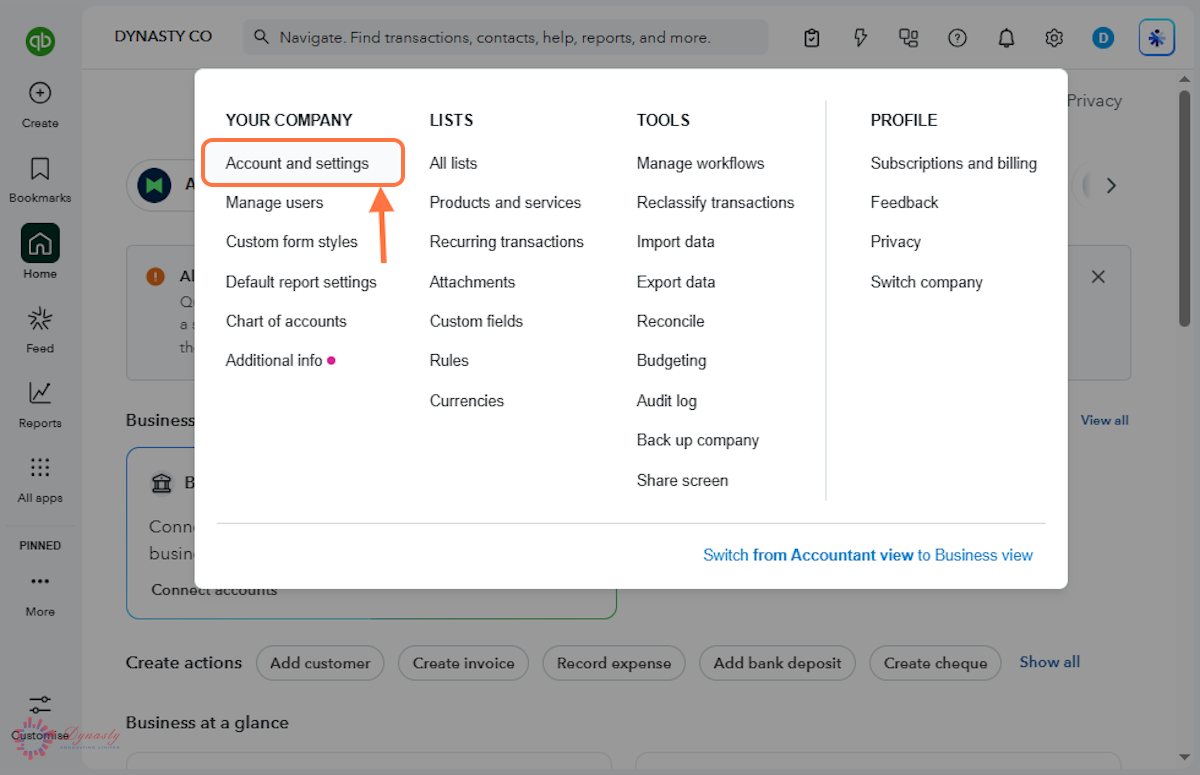
Figure – Opening Account and settings
Step 3 – Edit the Company Details
Click the pencil or Edit link at the right of a row, make the change, then click Save. QuickBooks confirms with a "Changes saved" message at the top of the window.
A Name – The legal or trading name of the business as it should appear on forms.
B Address – The company address used on invoices and for tax purposes.
C Email – The address customers see and reply to on sales forms.
D Phone – The contact number printed on customer-facing documents.
E Website – Your business website address.
F Industry – The sector the business trades in. QuickBooks uses it to suggest a suitable chart of accounts and reports.
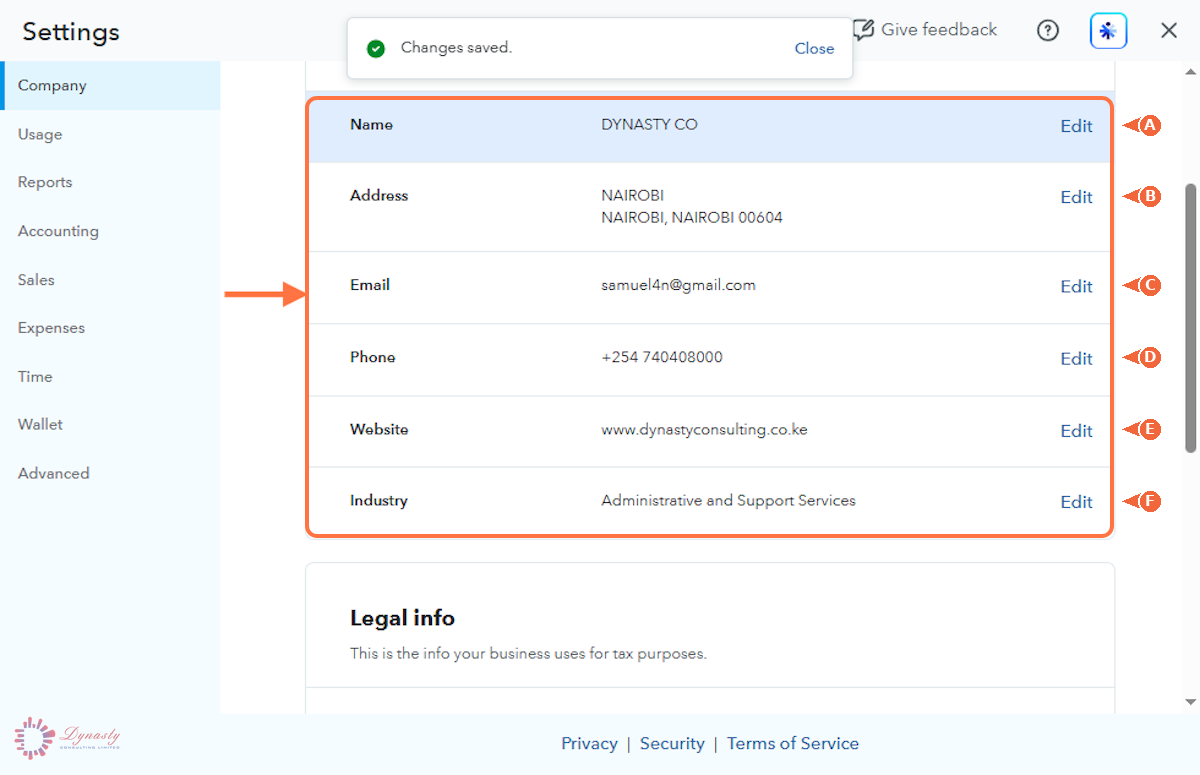
Figure – Editing the company details