
How to Do a Bank Reconciliation in QuickBooks Online
Reconciling compares the transactions recorded in QuickBooks Online against your bank statement. It catches missing entries, duplicates and errors, confirms the account balance is right, and gives you a dated record that the books agreed with the bank at that point.
Step 1 – Open Settings
A Settings (gear) – Click the gear icon in the top-right corner of QuickBooks Online.
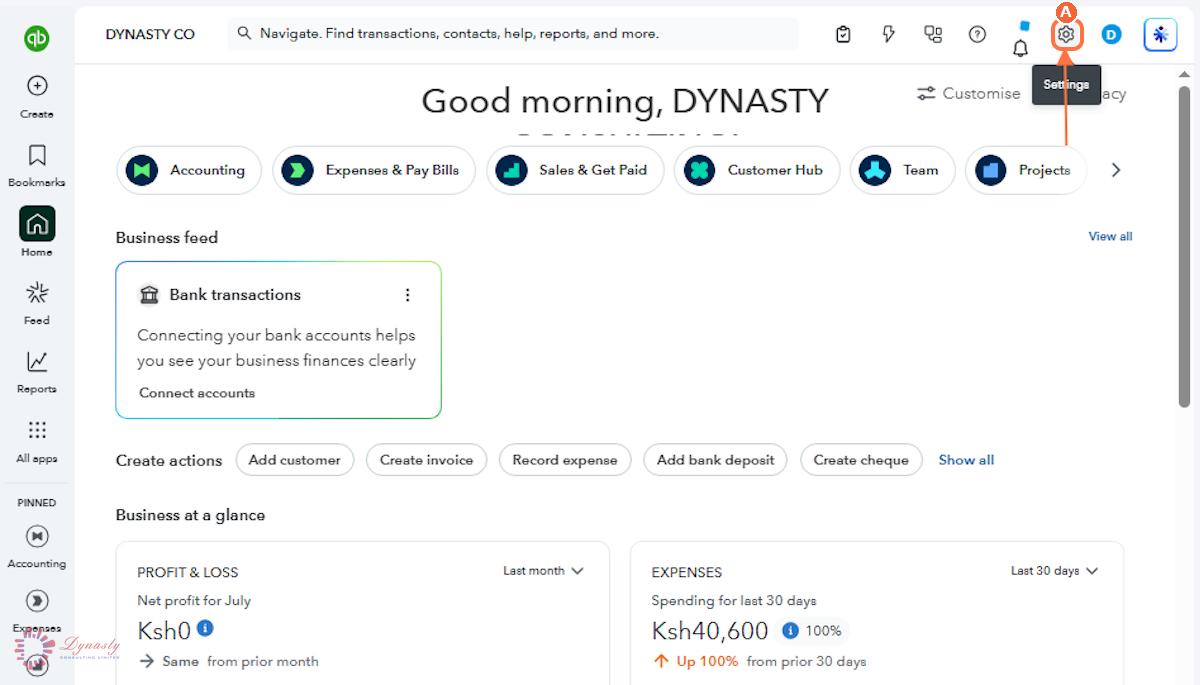
Figure – Opening Settings
Step 2 – Open Reconcile
You can also reach the same page from Accounting › Reconcile in the left navigation bar.
A Reconcile – Under the TOOLS section of the Settings menu, select Reconcile.
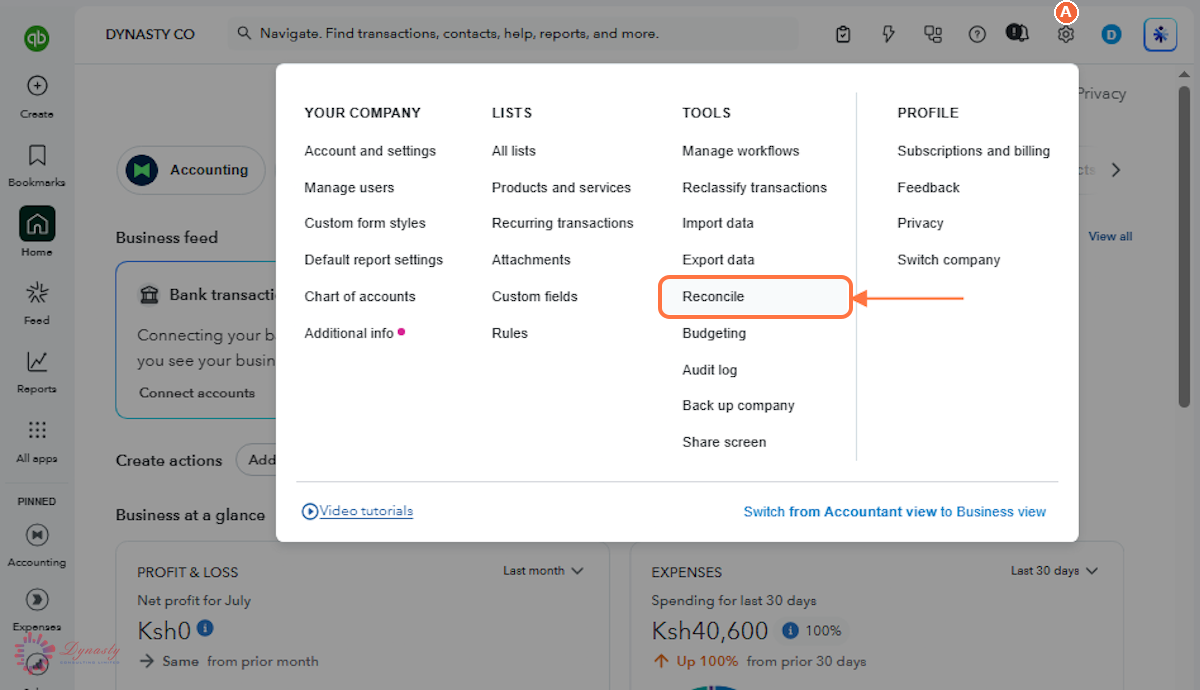
Figure – Opening Reconcile
Step 3 – Enter the Statement Details
A Account – Select the bank or credit card account you are reconciling.
B Statement ending balance – The closing balance printed on your bank statement. The Beginning balance to its left comes from the last reconciliation and should already match.
C Statement ending date – The closing date of the statement period.
D Date (service charge) – The date the bank charge appears on your statement.
E Service charge – Any bank charges or fees shown on the statement. Leave blank if there are none.
F Expense account – The account that records bank charges — usually Bank charges.
G Date (interest earned) – The date the interest was credited on your statement.
H Interest earned – Any interest the bank paid you during the period.
I Income account – The account that records interest received — usually Interest income.
J Start reconciling – Review the entries, then click to begin matching transactions.
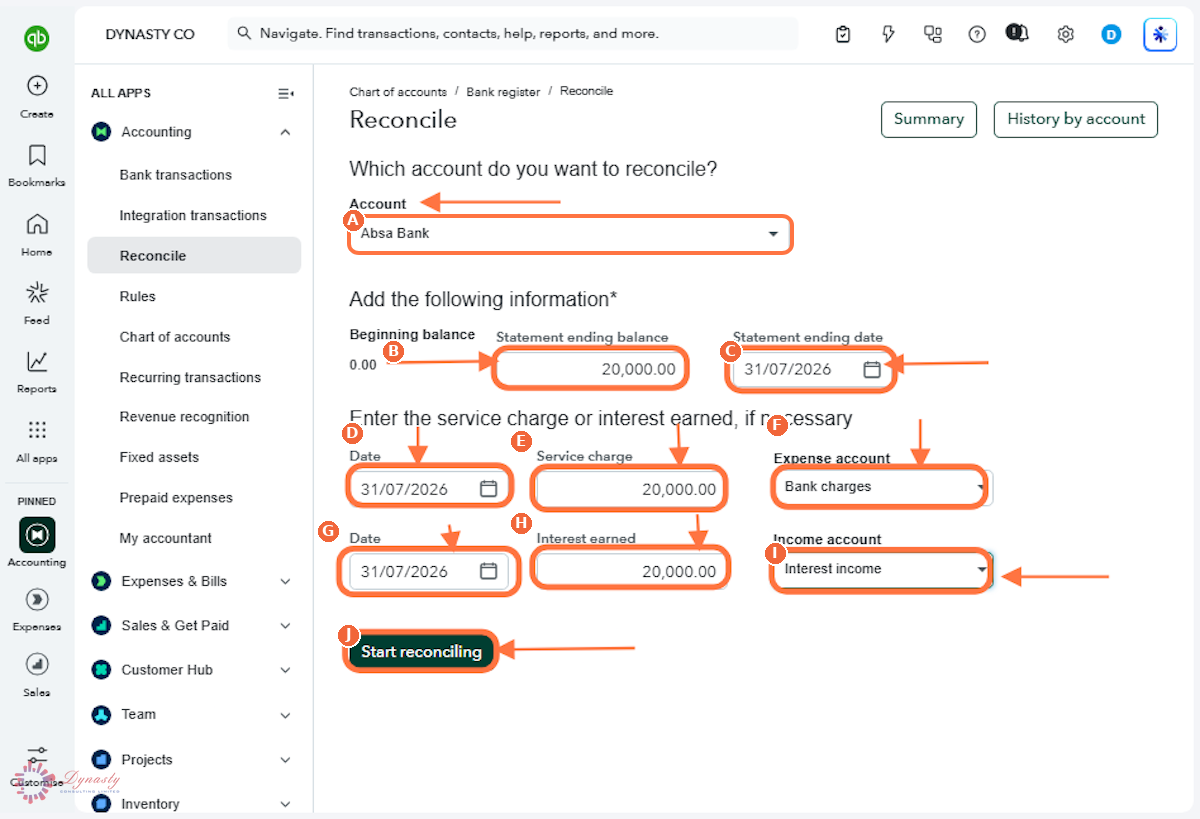
Figure – Entering the statement details
Step 4 – Match the Transactions
Only tick transactions that appear on both the statement and in QuickBooks. Anything left unticked stays outstanding and carries forward to the next reconciliation — which is correct for a cheque that has not yet been presented.
A Transaction checkmark – Tick the circle beside every transaction that also appears on your bank statement. Each tick adds to the cleared balance and reduces the Difference shown on the right.
B Finish now – Click once every matching transaction is ticked and the Difference reads 0.00. This completes the reconciliation and locks in the reconciled transactions.
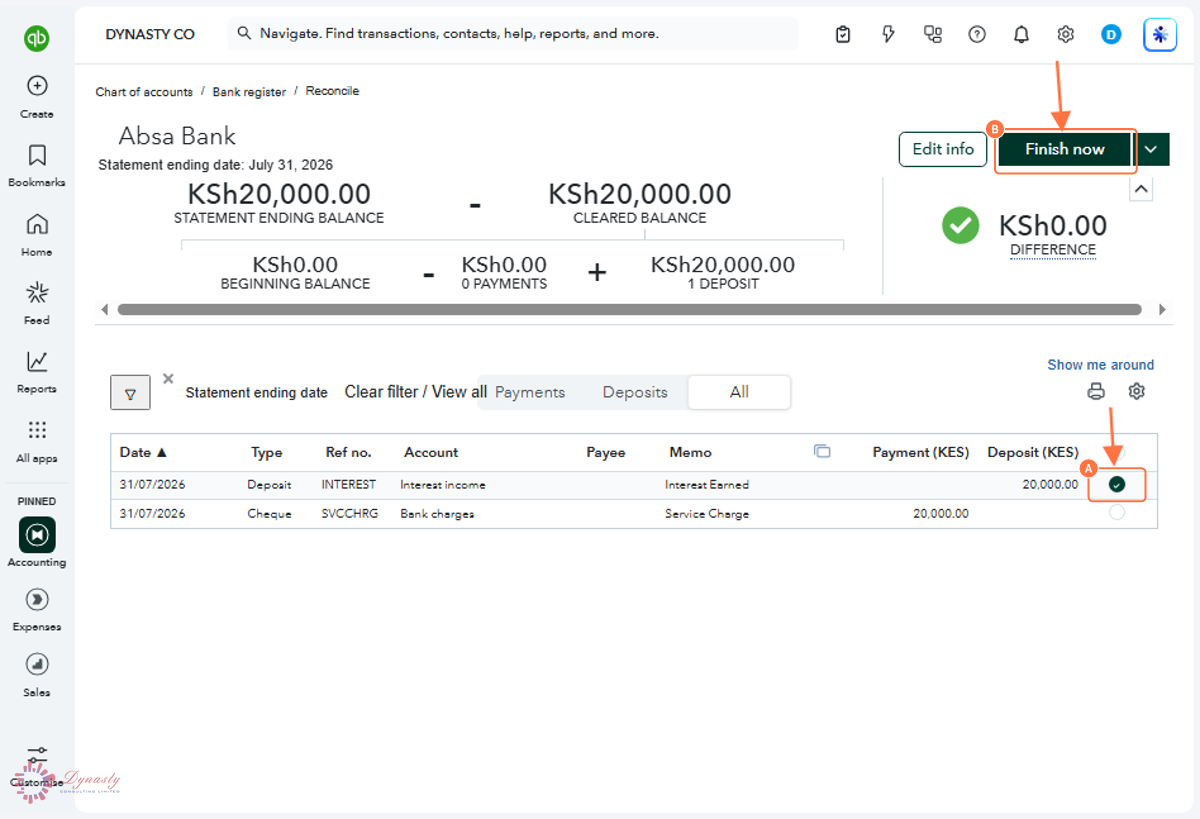
Figure – Matching the transactions
Step 5 – Complete the Reconciliation
A Done – Click to close the confirmation window. The reconciliation is complete and your records are updated.
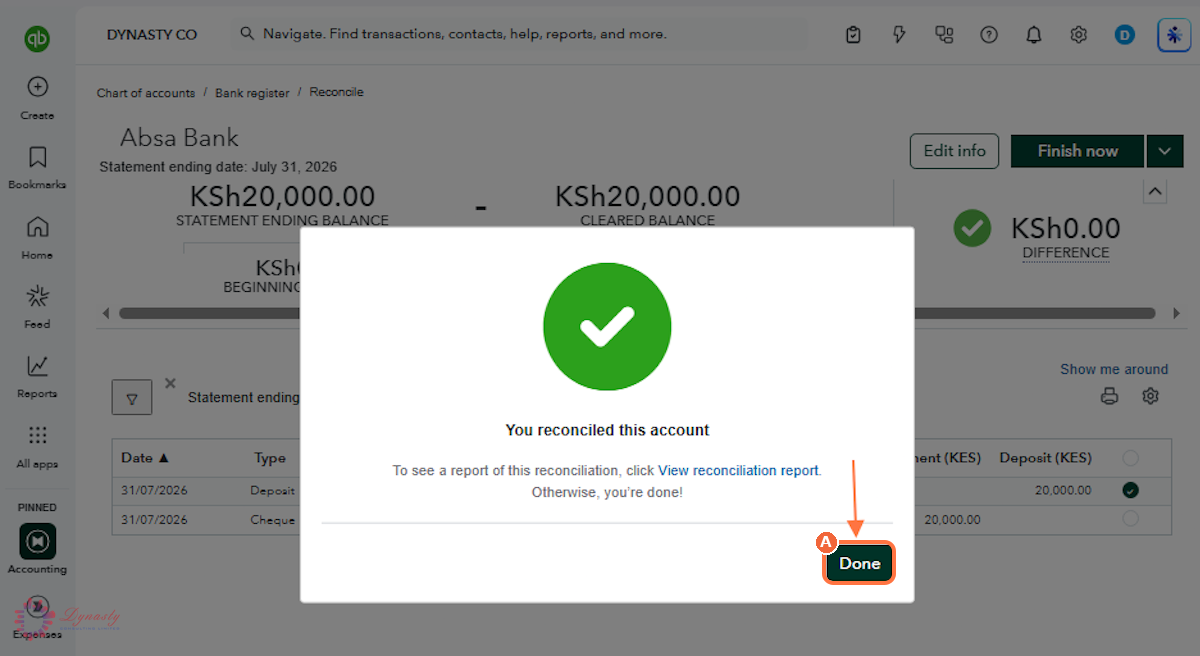
Figure – Completing the reconciliation