
How to Create an Invoice in QuickBooks Online
An invoice bills a customer for products or services and records the amount owed to you in accounts receivable. This guide creates an invoice for a customer assigned a foreign currency — QuickBooks Online applies the customer’s currency and exchange rate automatically, and the same steps apply to home-currency invoices.
Step 1 – Open a New Invoice
A Create (+) – Click the Create button at the top of the left navigation bar to open the transaction menu.
B Invoice – Select Invoice under the Customers column to open a new invoice form.
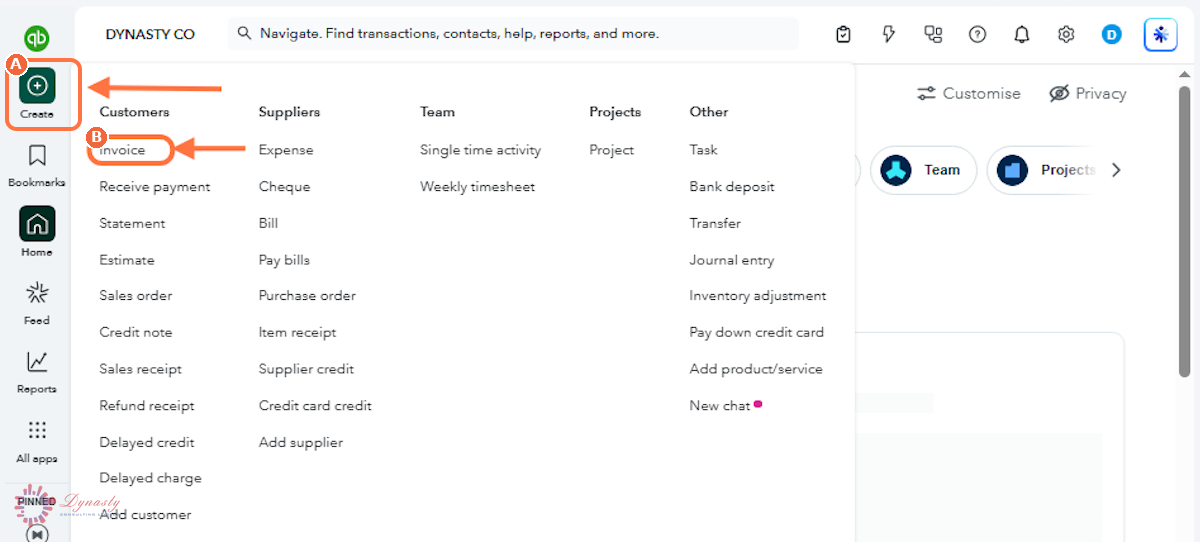
Figure – Opening a new invoice
Step 2 – Complete the Customer and Invoice Details
A Customer – Select the customer being invoiced. QuickBooks fills in their billing details automatically — and for a multi-currency customer, their assigned currency and exchange rate.
B Invoice no. – QuickBooks generates the next number automatically; enter your own if the business uses a custom numbering system.
C Terms – Select the payment terms — Due on receipt, Net 15, Net 30 or another predefined term. The terms set the due date and drive payment tracking.
D Invoice date – Enter or confirm the date of the invoice. The due date below updates automatically from the terms.
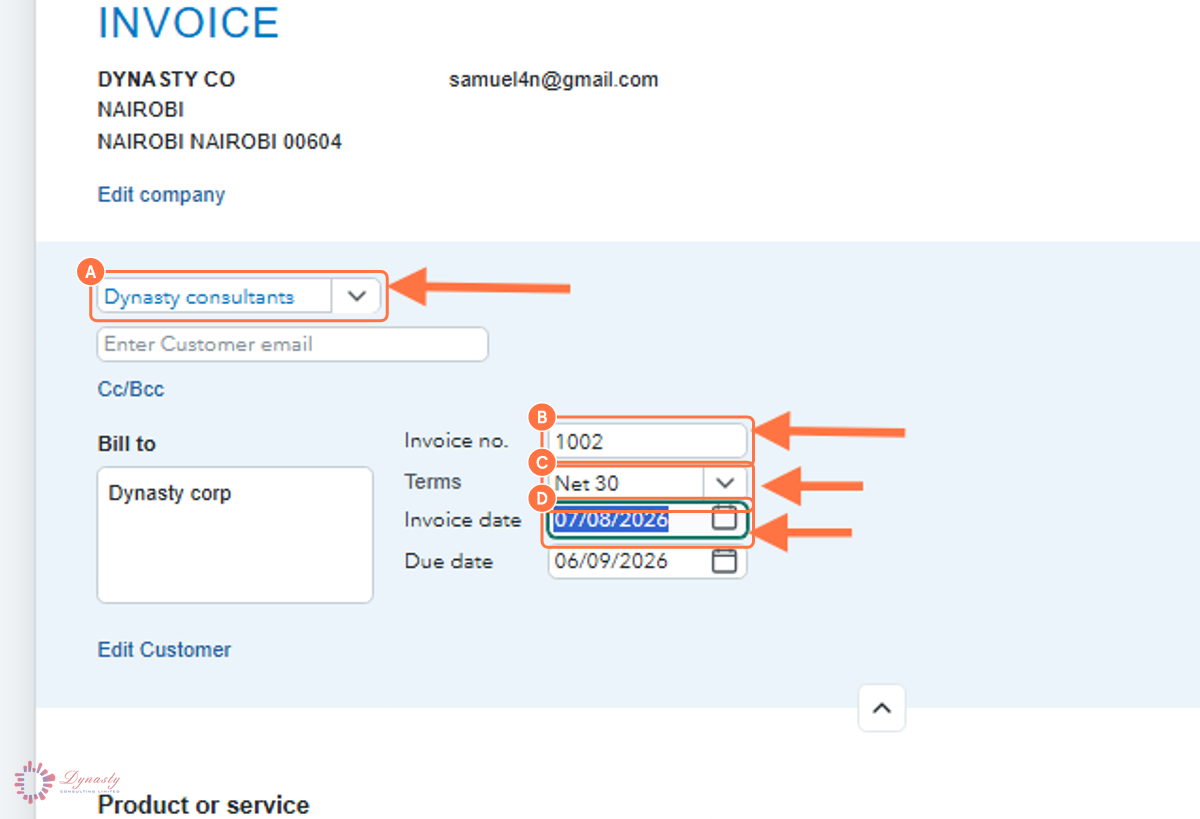
Figure – Completing the customer and invoice details
Step 3 – Add the Line Items and Save
A Product/service – Select the item being sold. It determines the income account and default pricing for the line.
B Description – A brief description of the product or service, shown on the invoice the customer receives.
C Qty – The number of units or hours being billed.
D Rate – The unit price. QuickBooks multiplies quantity by rate to calculate the line amount.
E Amount – The calculated line total — review it before saving.
F Save – Records the invoice without sending it.
G Review and send – Opens a preview and emails the invoice to the customer.
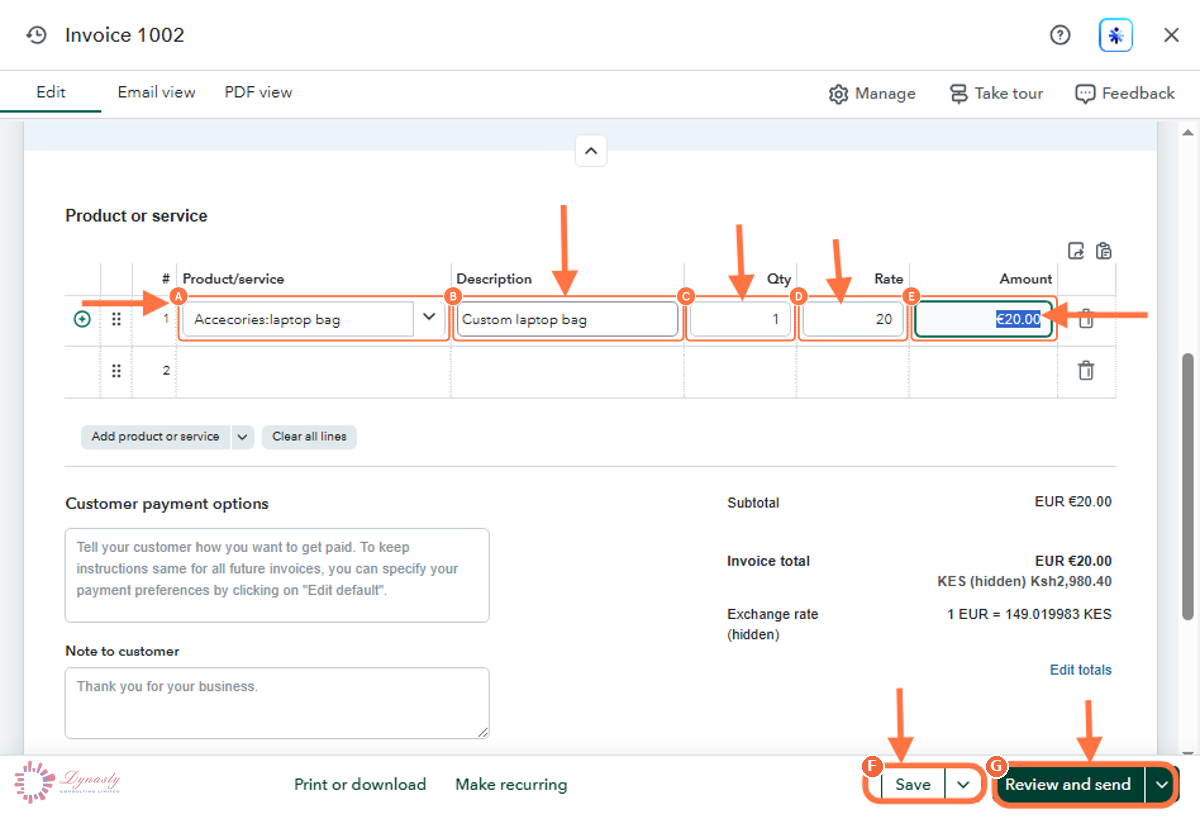
Figure – Adding the line items and saving