
How to Add Users in QuickBooks Online
QuickBooks Online allows administrators to add users and assign each of them a role. This lets employees, accountants and other authorised people work in the company file with only the access their responsibilities require.
Step 1 – Open Settings
Click the Settings (gear) icon in the top-right corner of the QuickBooks Online dashboard to open the settings menu.
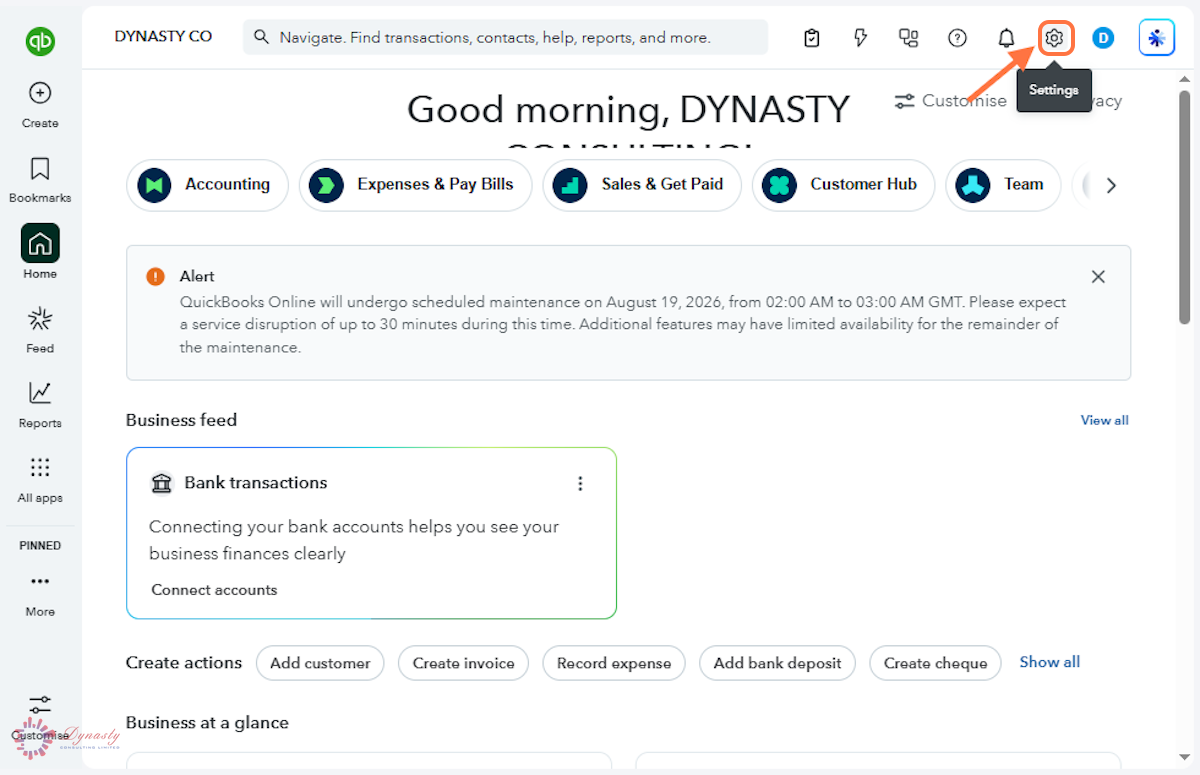
Figure – Opening Settings
Step 2 – Open Manage Users
Select Manage users under YOUR COMPANY. This section shows existing users, their roles and their invitation status.
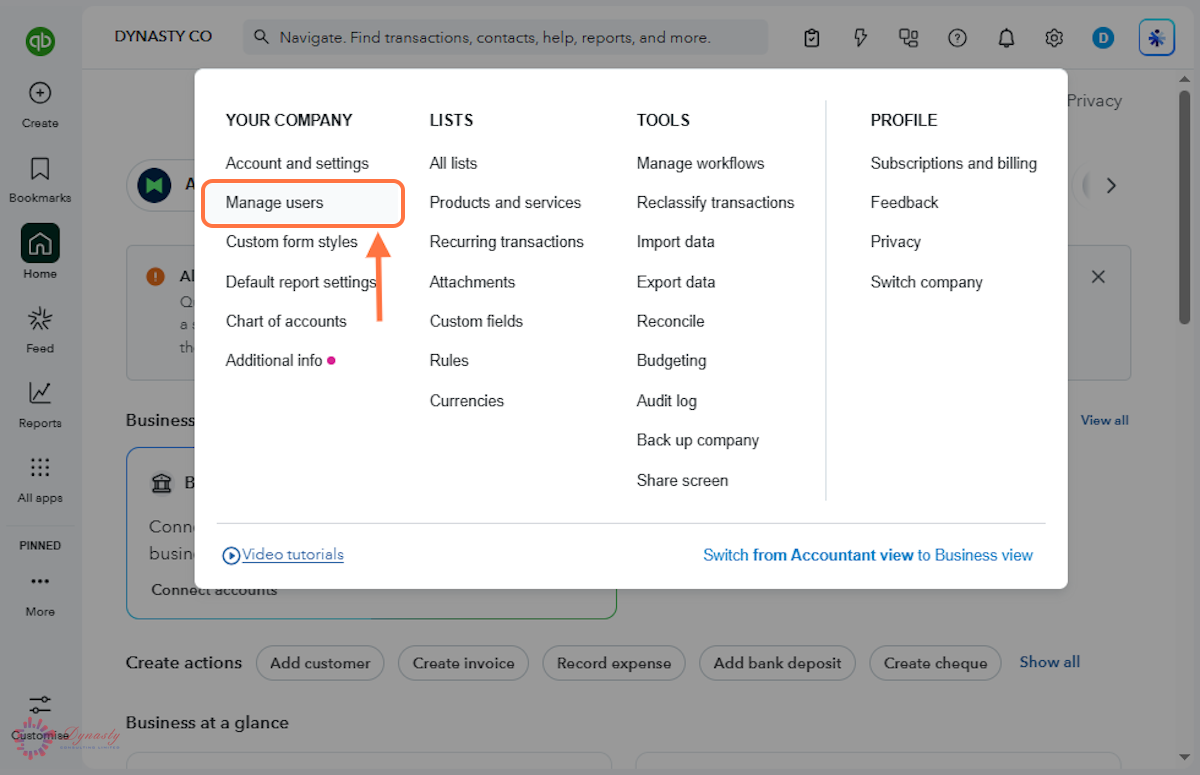
Figure – Opening Manage users
Step 3 – Click Add User
Click Add user on the right of the Manage users screen to begin creating access for a new person.
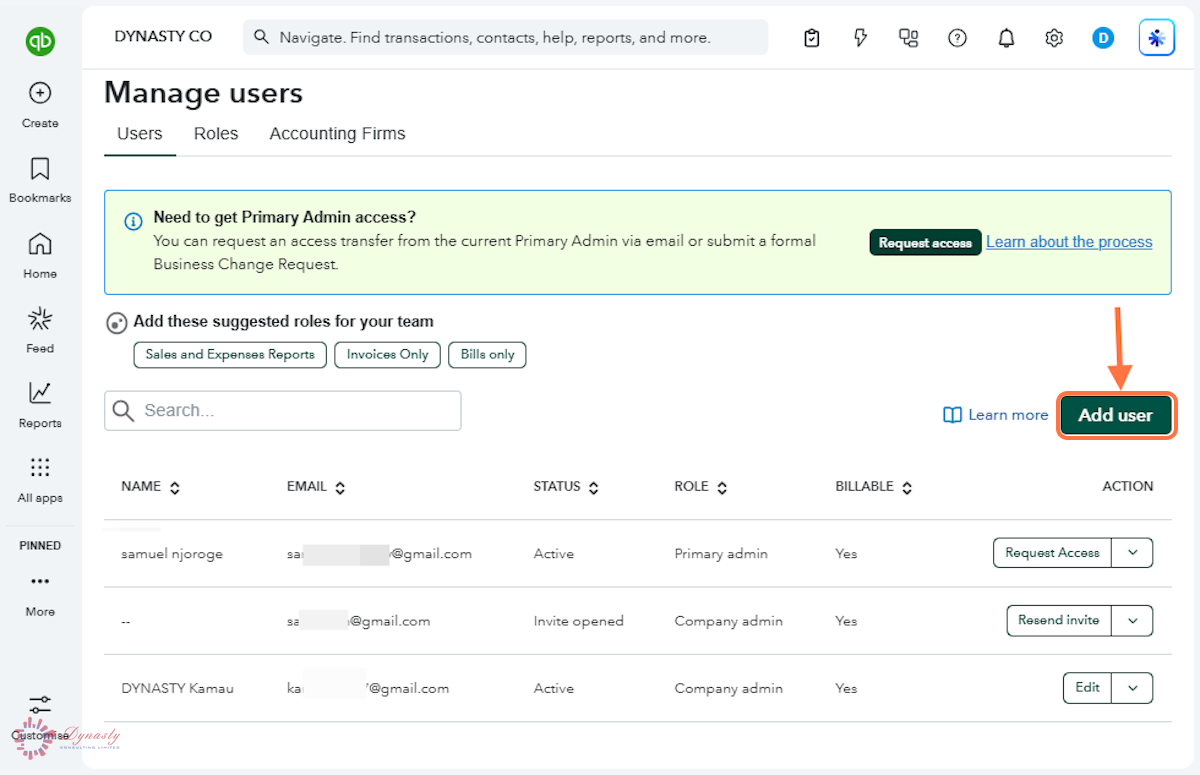
Figure – Starting a new user
Step 4 – Enter the User Details and Assign a Role
A First name – Enter the user’s first name.
B Last name – Enter the user’s surname.
C Email – The invitation is sent to this address, so check it carefully.
D Assign roles – Choose the role that matches the user’s responsibilities.
E Send invite – Click to email the invitation to the user.
Roles you can choose from include:
Accounts Payable – Bills, supplier transactions and payments made.
Accounts Receivable – Customer invoices, payments received and receivables.
Company admin – Full access to the company, its users, settings and accounting.
View reports only – Read-only access to financial reports, with no access to other accounting functions.
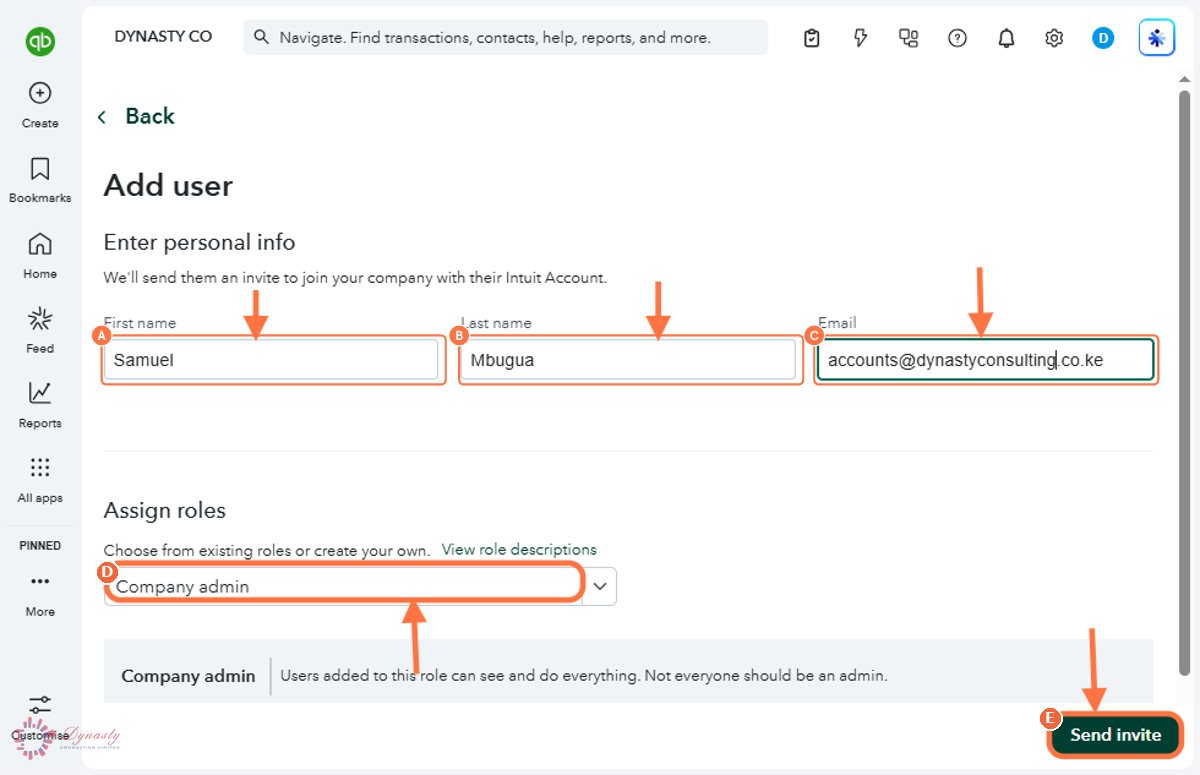
Figure – Entering the user details and role
Step 5 – Verify the Change with the Six-Digit Code
Once verified, the new user appears in Manage users with the status Invited until they accept.
A Enter the 6-digit code – Type the code sent to your registered phone number by text message or automated call.
B Continue – Click to complete verification and send the invitation.
C If the code does not arrive – Use I didn’t get a text message to resend it, or Call me instead to receive it by automated phone call.
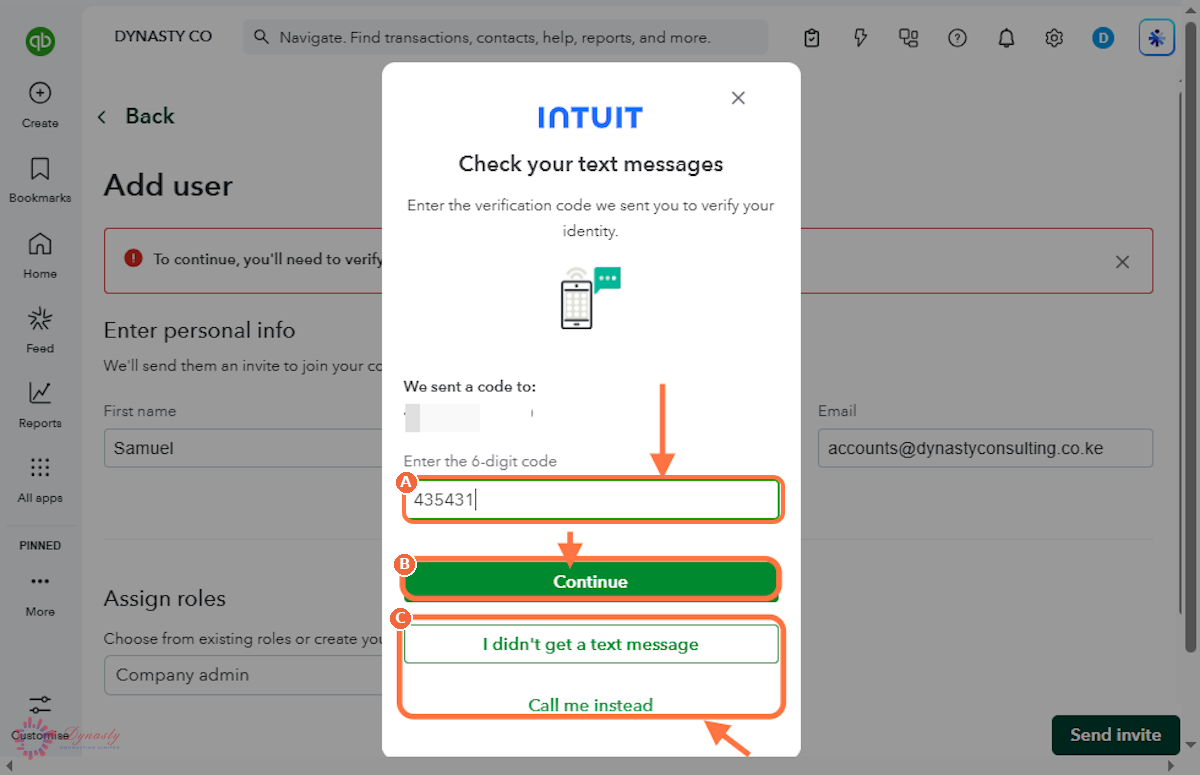
Figure – Verifying the change